Welcome to this online guide, which will show you how, in a few quick steps, configure OneLogin with Hector. This will allow you to benefit from single sign on functionalities, as well as performing user and group imports into Hector.
1. Connect to your OneLogin account.
You must have administrator privileges in order to add Hector.
Once connected, click on the “Administration” link.
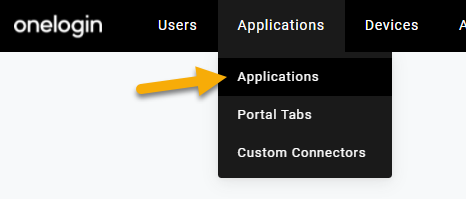
2. Application Tab
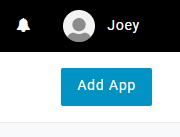
Navigate towards the Application tab and click on the “Add App” button at the top right.
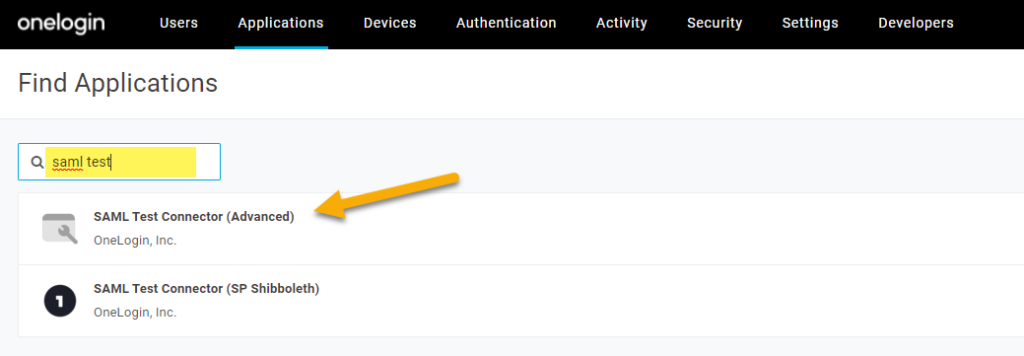
3. Find the application
In the search box, enter the value “saml test” and choose the SAML Test Connector (Advanced)” connector.
4. Create the application
Name the application “Hector” or any other value that you want to make public for your users.
You can use the following Hector logos so that users can easily recognize the application.
When done, click on “Save”.

Rectangular Logo

Square Logo
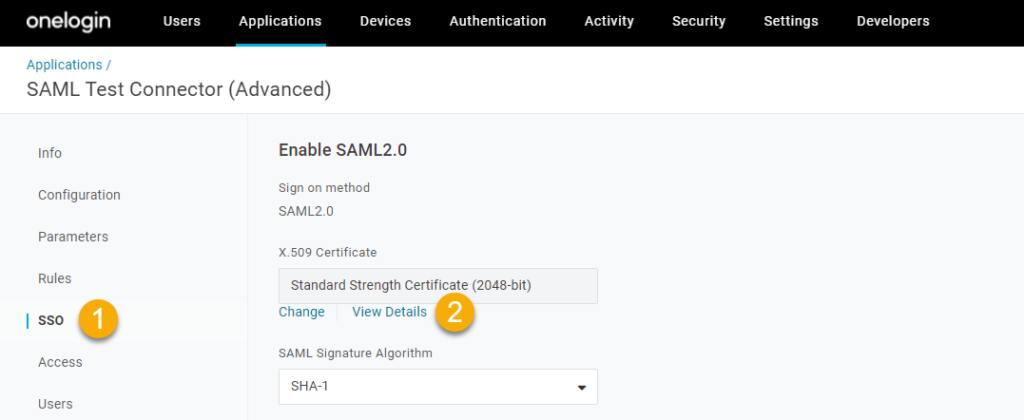
5. SSO
Once saved, you will brought to a page that looks like the one below in the info section.
- Click on SSO.
- Click on the View Details” link in the Certificate section.
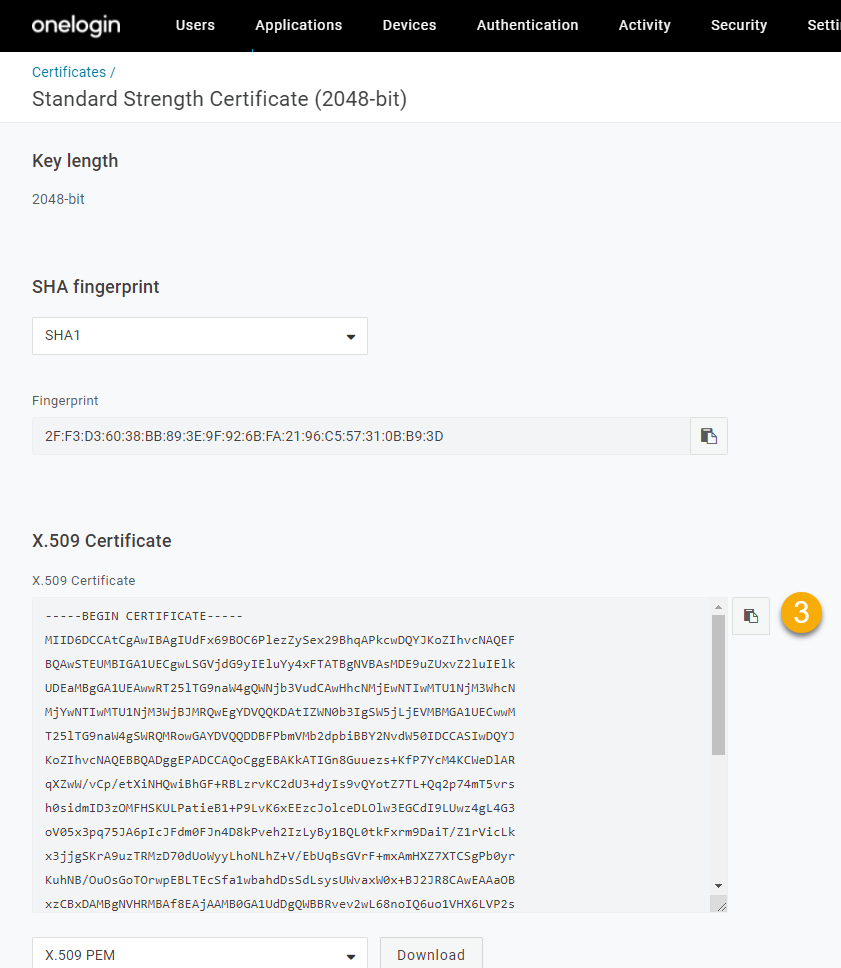
- Copy the certificate value, you will need it in a future step.
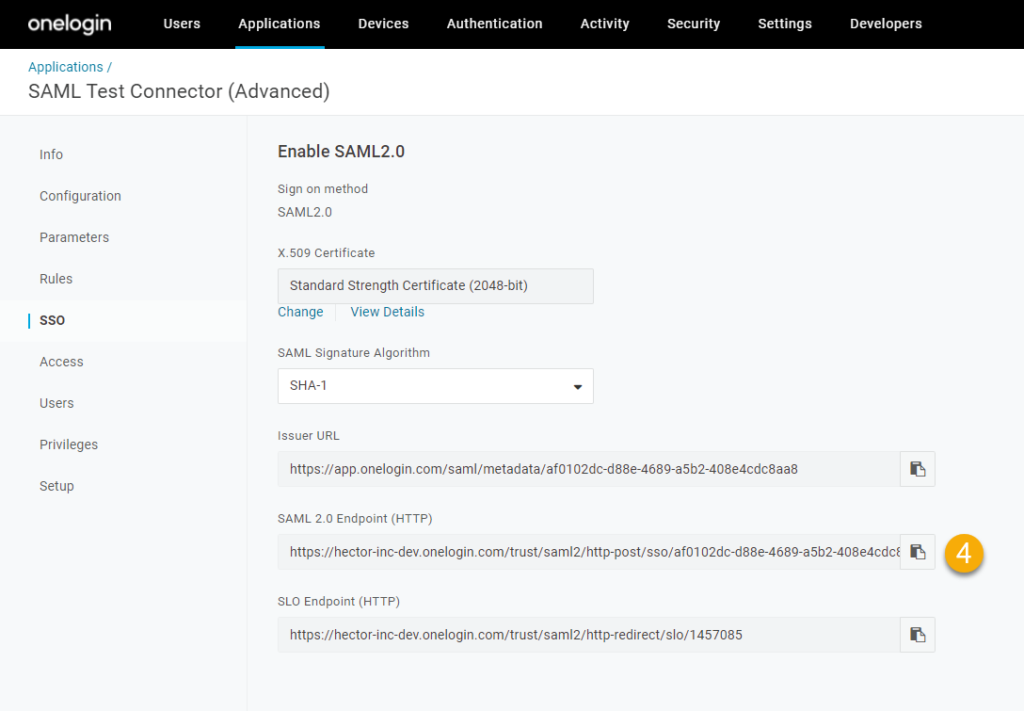
- Click on your browser’s back button and copy the value for “SAML 2.0 EndPoint”.
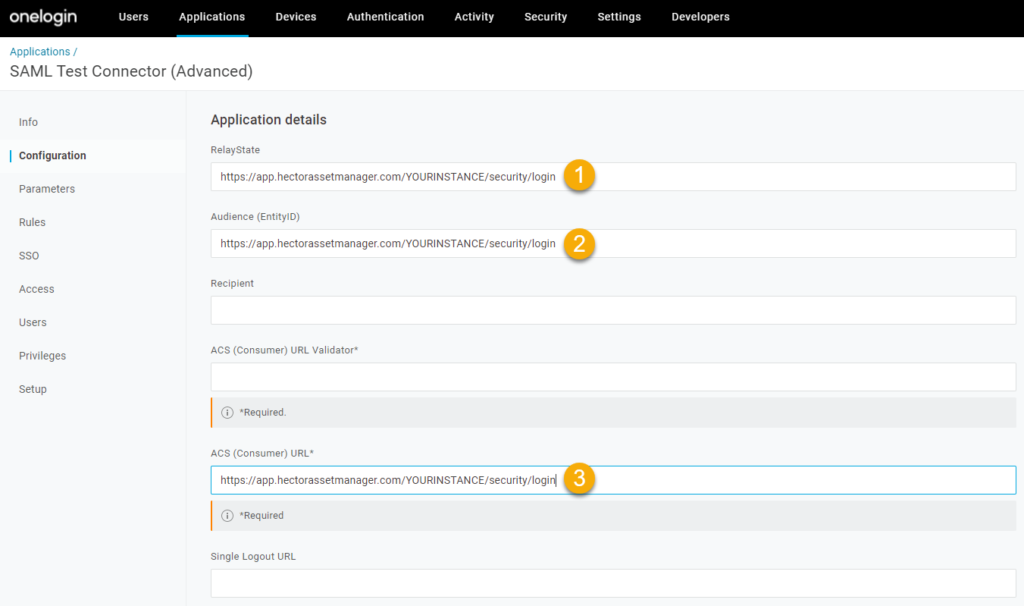
6. Configuration Section
Get the URL for your organization from Hector. This is the address of your environment. If you are unsure what to use, you can find the address in the Settings > Security > OneLogin.
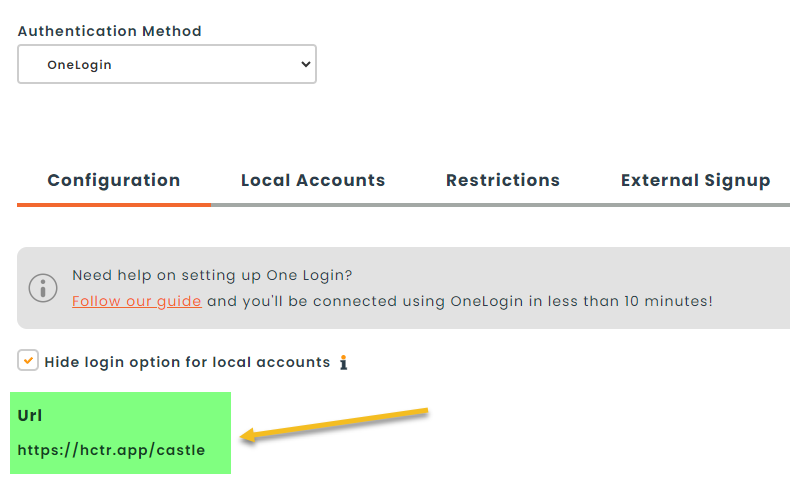
Enter this value for the following three fields :
- Relay State
- Audience (EntityID)
- ACS (Consumer) URL
7. Developers Tab
Hover over the Developers section, and then click on API Credentials section.

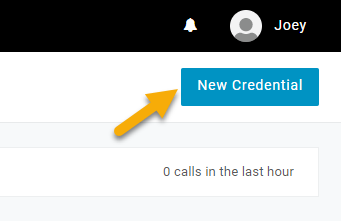
8. New Credential
On the right side of the screen, you will see a button called “New Credential”. Click on this button.
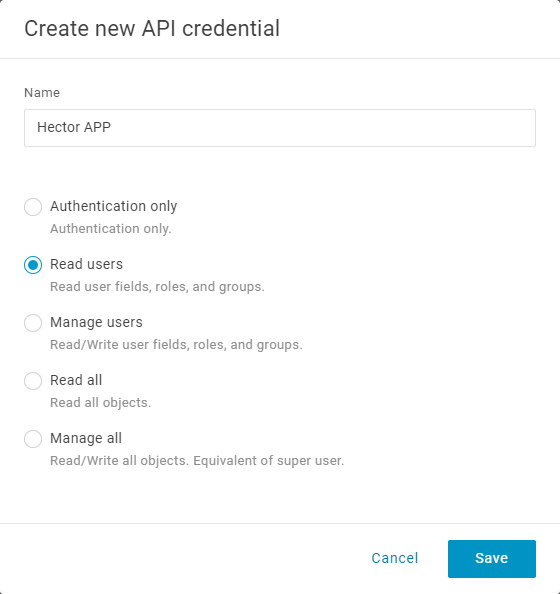
9. Security
- Give your new API credential a name. In this example, we set the name to Hector APP.
- For permissions, select one of the two possible choices.
- Authentication Only : Choose this option if you are not planning on syncing your users.
- Read users : Choose this option if you are planning on authenticating, as well as importing users and groups.
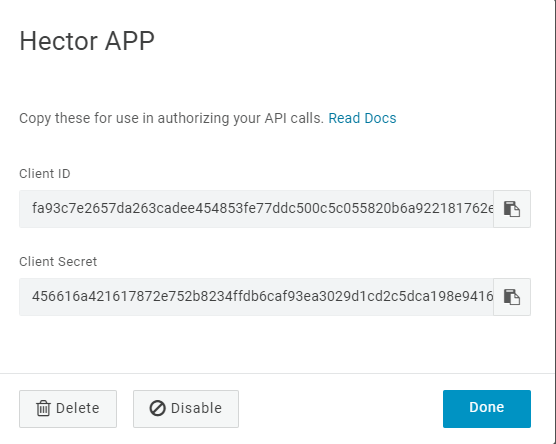
10. Client ID and Client Secret
Once saved, OneLogin will show a very important screen containing both your Client ID and Client Secret. We’ll need these two values in order to authorize and synchronize users.
11. Subdomain
Before leaving OneLogin, we’ll need one more information. This is the subdomain and is required to make API calls to the right environment.
We can obtain this information by looking at the url of your OneLogin connection and copying the portion on the left side of .onelogin.com/portal.

12. Hector Setup for OneLogin
- Connect to your Hector instance as an administrator.
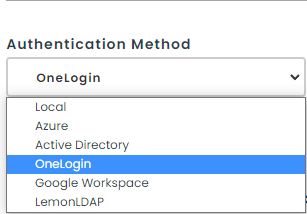
- Navigate to the “Settings” menu, and then click on “Security”.
- Once inside, click on the “OneLogin” option in order to display the necessary fields to configure authentication using OneLogin.
13. SAML Authentication
Copy the values from step 5 in the SAML 2.0 Endpoint (HTTP) and Certificate fields in order to allow Hector to authenticate users by SSO using OneLogin.

Your users can now use their OneLogin email and password to connect to the Hector App.
14. Mobile App access and User Synchronization
If you would like your users to connect to the Mobile App, or perform daily synchronization of all your users with Hector, you must fill in the following two sections.
For Mobile App Access
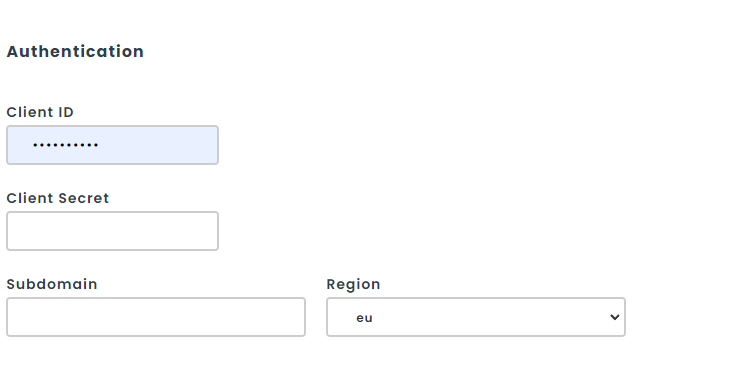
Copy and paste the values obtained in steps 9 and 10 of this user guide.
- Client ID
- Client Secret
- Subdomain
- Region
For User/Group Synchronization
Make sure that you filled in the Client ID, Client Secret, Subdomain and Region. Once done, click on the “Import Users” checkbox. If this step is not done, users will not be synchronized from OneLogin.
- Administrators Group
- Staff Group
- Users Group

When you are done, click on the “Save” button to save your settings. You are now ready to launch your first synchronization using the “Launch Manual Synchronization” button.