Welcome to this online guide which will show you how to, in a few quick steps, configure your Azure Directory/Intune with Hector. This will allow you to import and synchronize your organization’s devices daily from your AD and Intune Console.
1. Connect to your Microsoft Azure account.
You must have administrator privileges in order to add Hector as an authorized App.
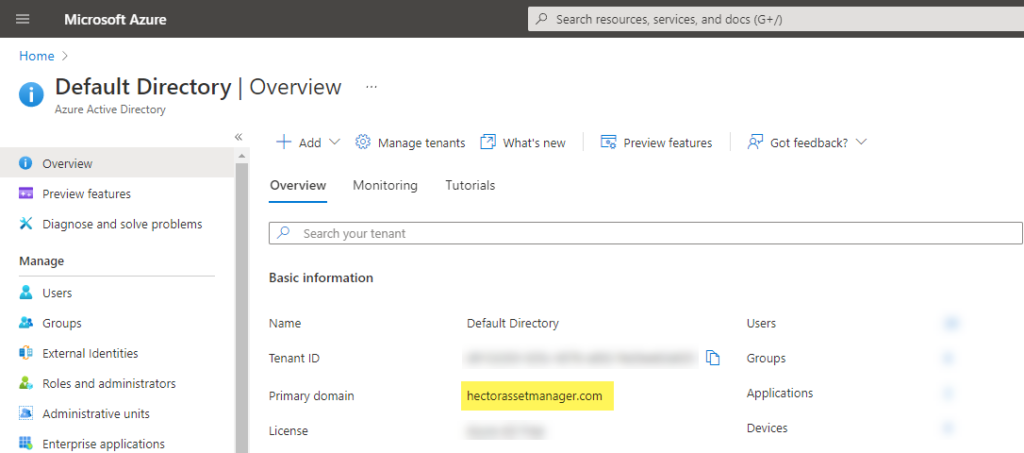
2. Primary Domain
Once connected, click on the “Azure Active Directory” link and then copy your Azure Primary Domain, located below, as you will need it later in the guide.
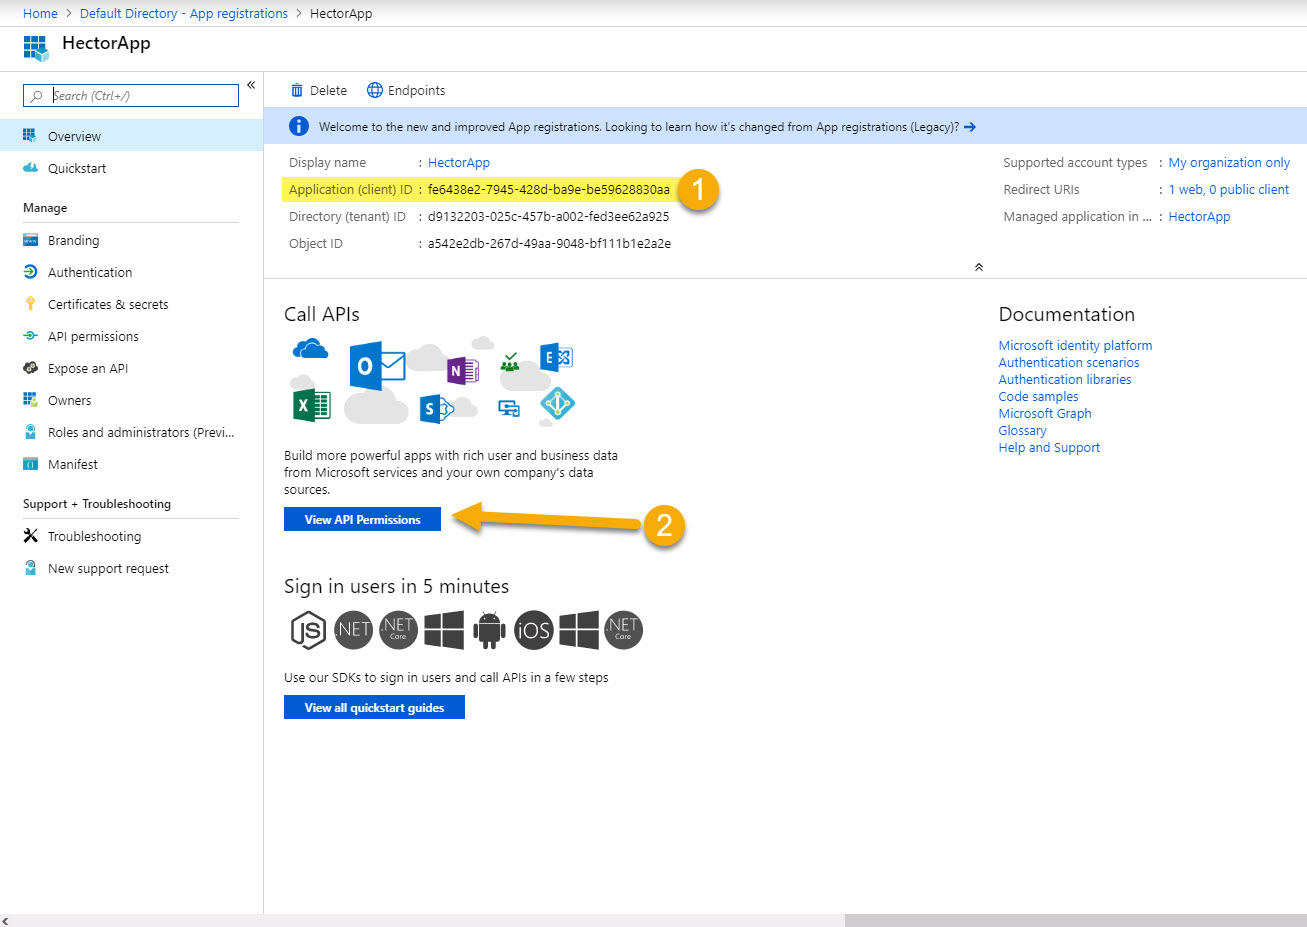
3. Client ID
You will then navigate to your registered application and copy the “Application (client) ID” in the overview section and also keep it for later.
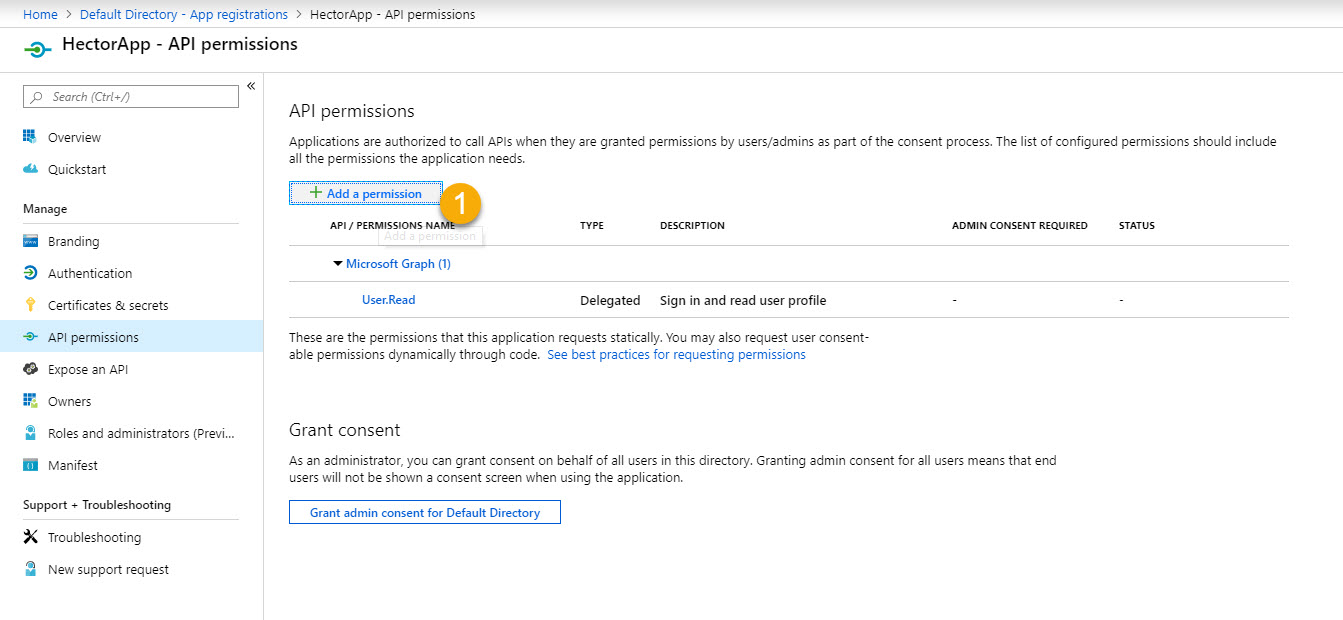
4. Permissions
Click on the “Add a permission” button
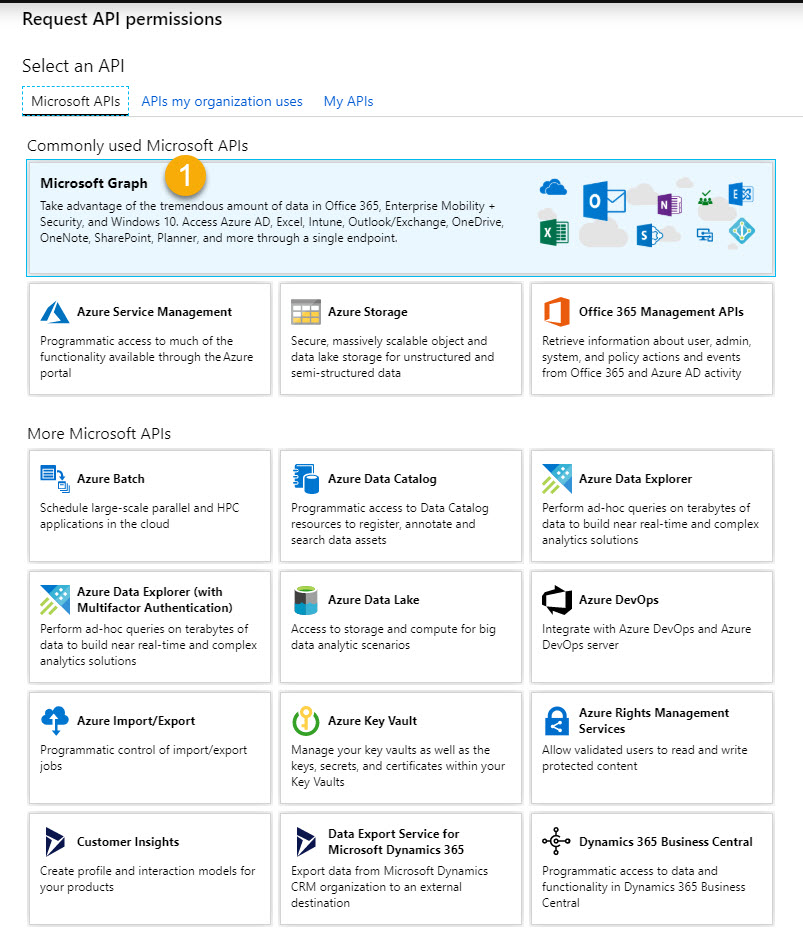
Click on the “Microsoft Graph” section.
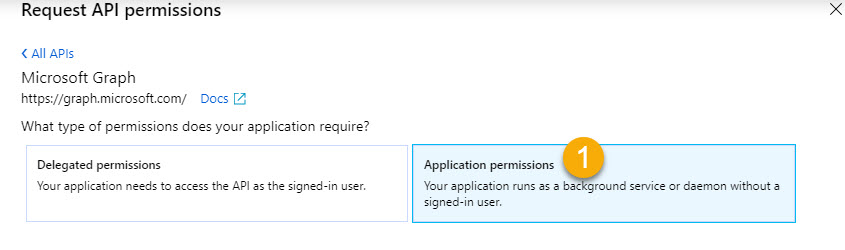
Click on the “Application permissions” section.
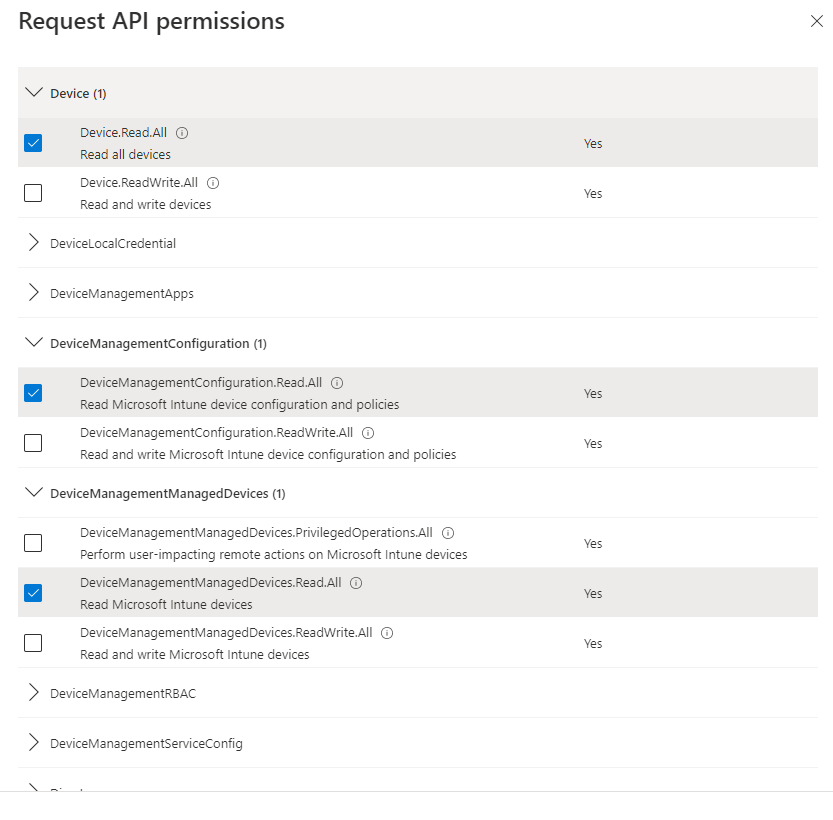
Scroll until you find the Device, DeviceManagementConfiguration and DeviceManagementManagedDevices sections and expand using the arrow.
Select the permission “Read.All” from those three sections and then click on the “Add permissions” button at the bottom.
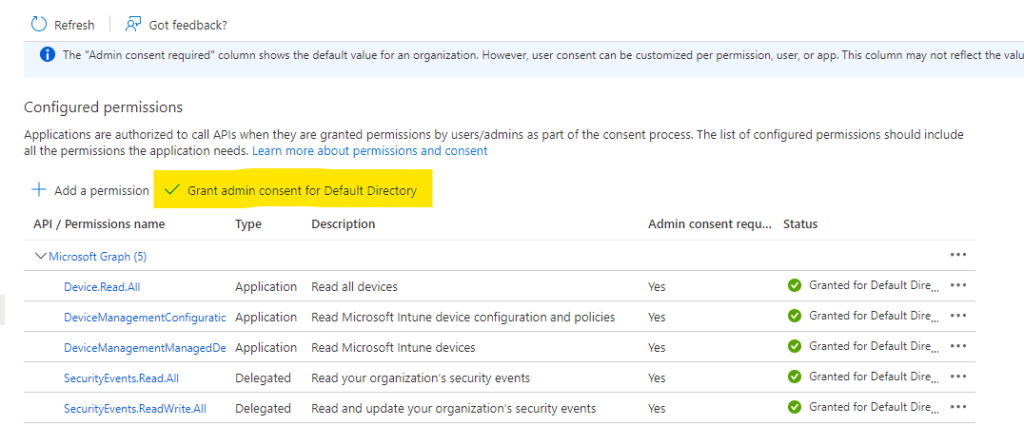
Once the permission has been added, it must be consented to.
- Validate that the newly added permission is indeed part of the permission list.
- Click on the “Grant admin consent for …………….” button
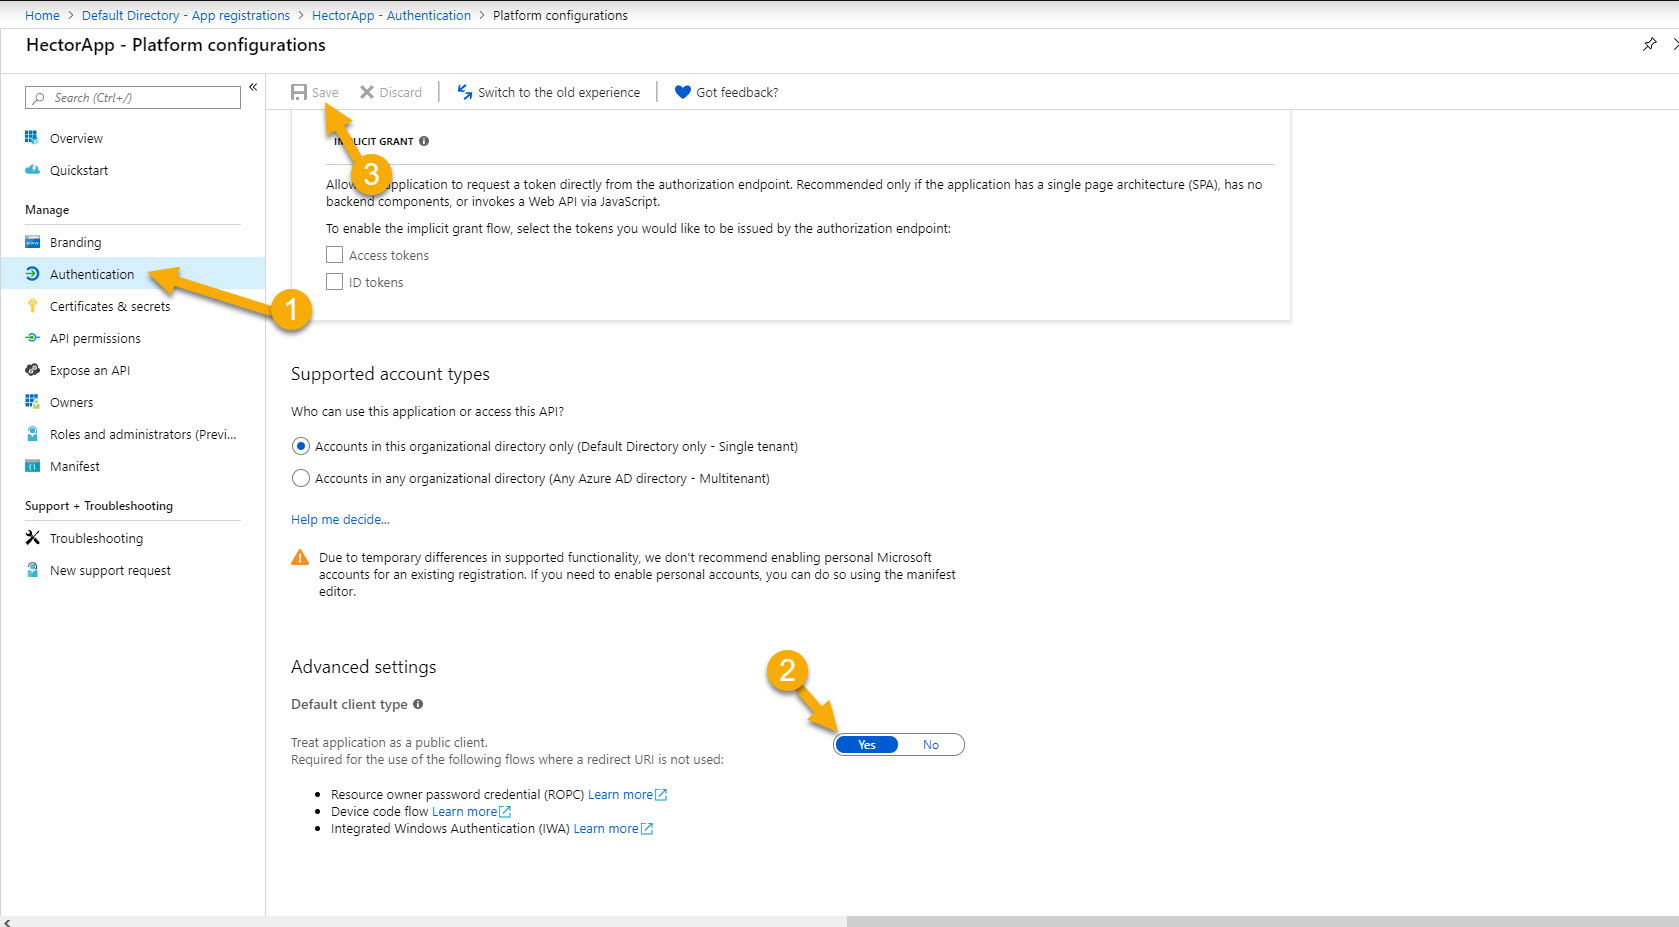
5. Public App
Make the application public, in order for Hector to connect to it.
- Click on the Authentication section
- Scroll to the bottom and in the “Advanced Settings”, click on “Yes” to set the application as a public client.
- Click on the Save button
6. Secret Key
Click on the “Certificates & secrets” section
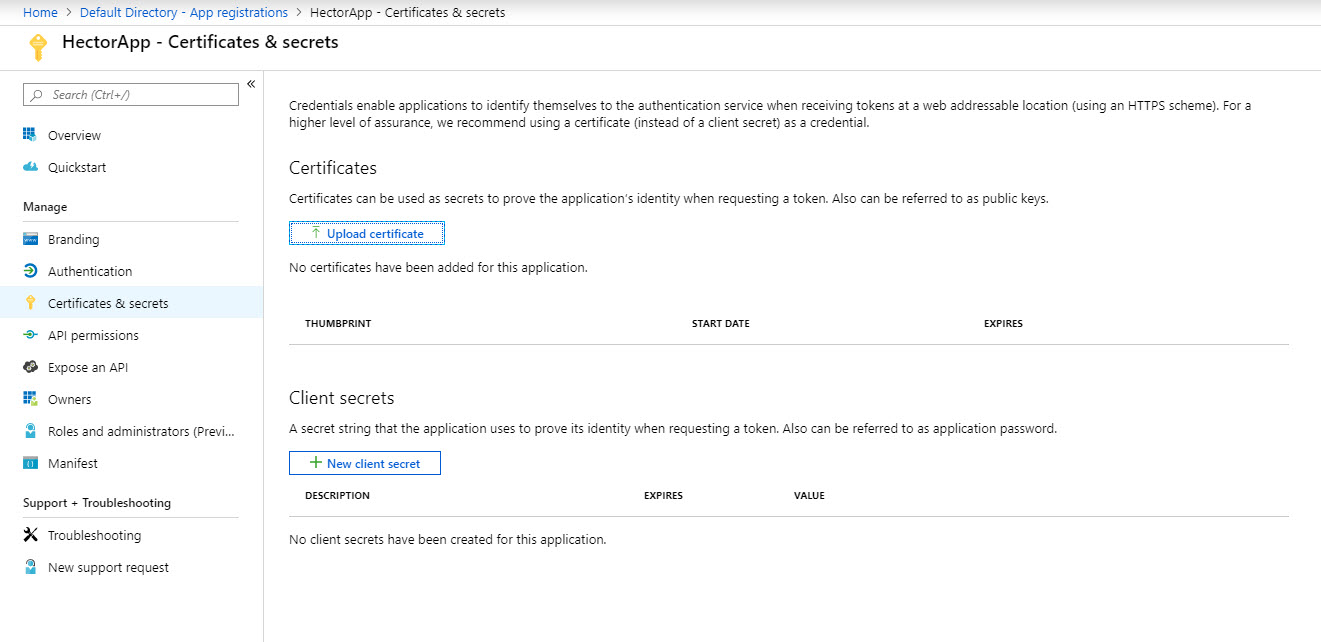
Next click on the “+ New client secret” button
- Enter “HectorApp” as a description
- Enter Never, or another expiration delay
- Click on the Add button

Copy the secret value and save for later

You have completed the Azure portion of the setup. Next step is to access your Hector instance as an administrator
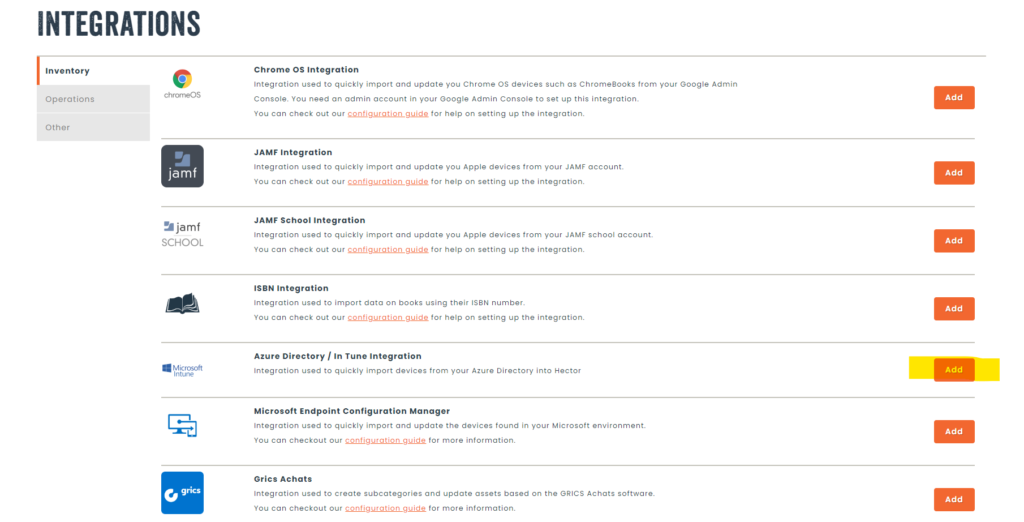
7. Hector Setup
Connect to your Hector instance as an administrator and navigate to the “Settings” menu, and then click on “Integrations”. Once inside, choose the “Integration Azure Directory / In Tune” in the “Inventory” tab and press “Add”.
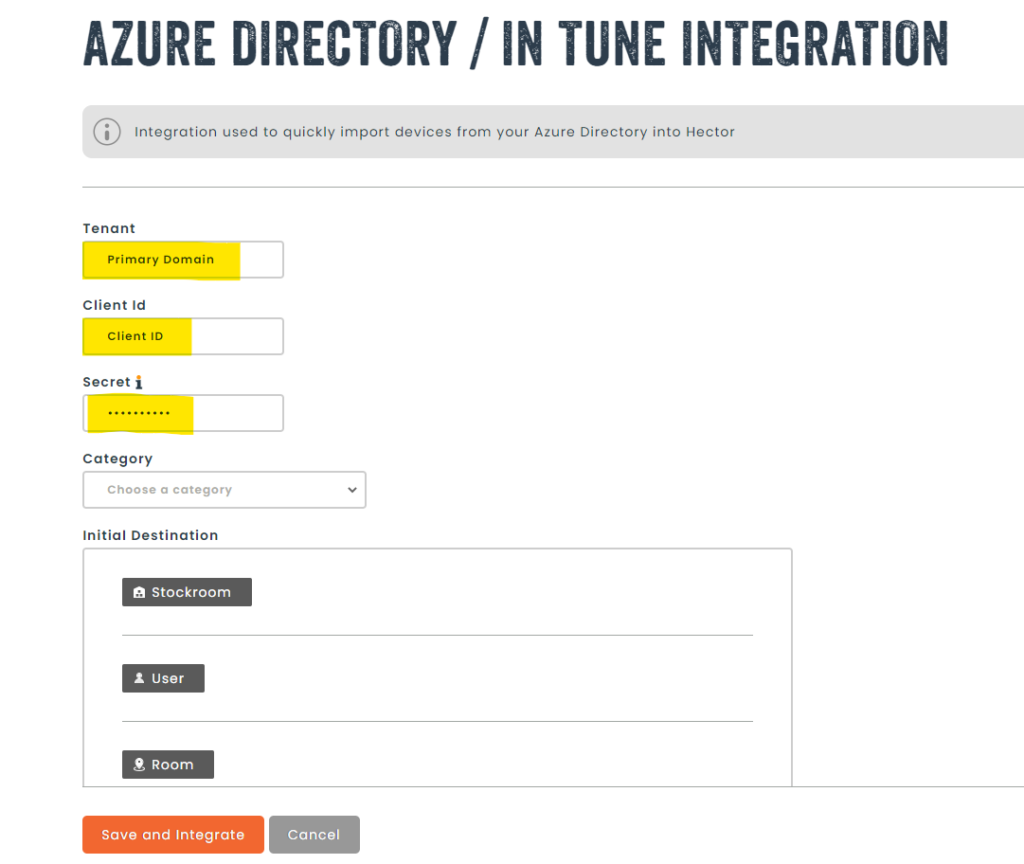
In order for the integration to work, you need to enter the primary domain, client ID and secret key retrieved earlier and choose a default category and initial destination.
8. Hector Options
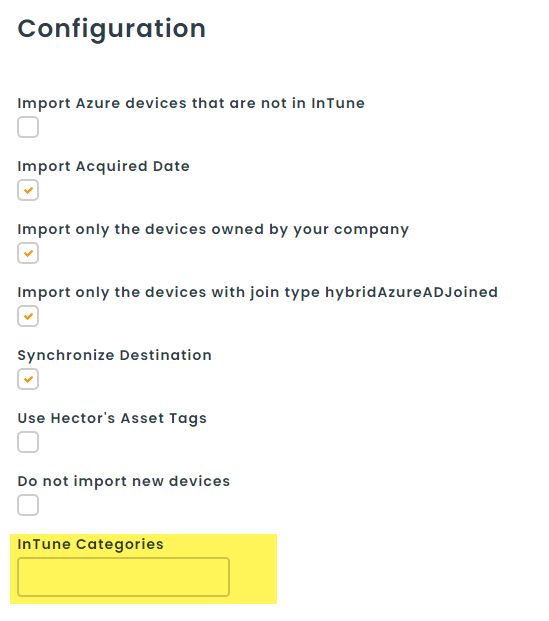
Here is a rundown of all the possible options to date in Hector and how they are used by our application:
- Tenant: From Azure
- Client ID: From Azure
- Secret: From Azure
- Category: The category in which the devices are going to be initially created
- Initial Destination: The whereabout in which the devices are going to be initially created if the destination synchronization is not activated or it wasn’t found
- Import Azure devices that are not in Intune: If activated, Hector will still import your devices that are found in your Azure AD but not in Intune
- Import Acquired Date: If activated, Hector will put the value of the AD field “createdDateTime” in the Hector Field “Acquired Date”.
- Import only the devices owned by your company: If Activated, Hector will only import the devices marked as owned by your company
- Import only the devices with join type hybridAzureADJoined: If activated, Hector will only import the devices with join type “hybridAzureADJoined”
- Synchronize Destination: If activated, Hector check to see if there is a matching email address between the devices and the users and will automatically update it
- Do not import new devices: If activated, the integration will not import new devices, but instead only update the ones already existing. It will make a match with existing assets based on their asset tag or serial number with the attribute chosen below.
- Intune Categories: You can specify categories from your Intune environment (the field “deviceCategoryDisplayName”) by separating them with a comma. If categories are added this way, Hector will only import the devices who are part of those categories.
- Serial Number: By default, the integration will create a serial number attribute, but you could also specify one from the attributes you already have. This can be useful with the option “Do not import new devices”.
- Attribute Selector: Select which attributes from the list you want Hector to create and update on the imported devices
Don’t forget to save!
Your Intune integration is now set up and active. An automatic synchronization of all the devices in your organization will be performed every day.