Welcome to this online guide which will show you how to configure your Salto KS environment to Hector. The goal of this is to manage the access to your Salto locks using Hector’s loaner module.
Hector Setup
Firstly, you need to be connected to a Salto KS environment. Once this environment is setup and your locks are visible in the Salto dashboard, you are ready to continue.
The next step is to login to Hector with an account that has admin privileges, and navigate to Settings > Integrations. On the menu, click on the Loaners section.
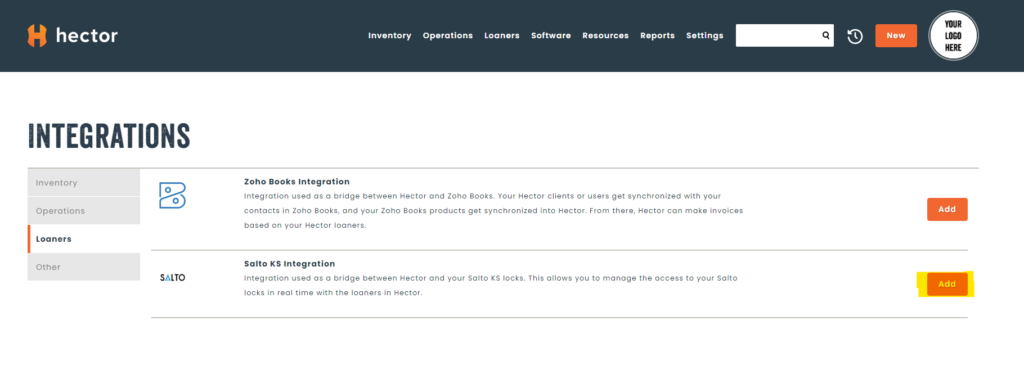
Find the Salto integration and click Add. You will be taken to a page where you will need to fill the information in order for the integration to work.
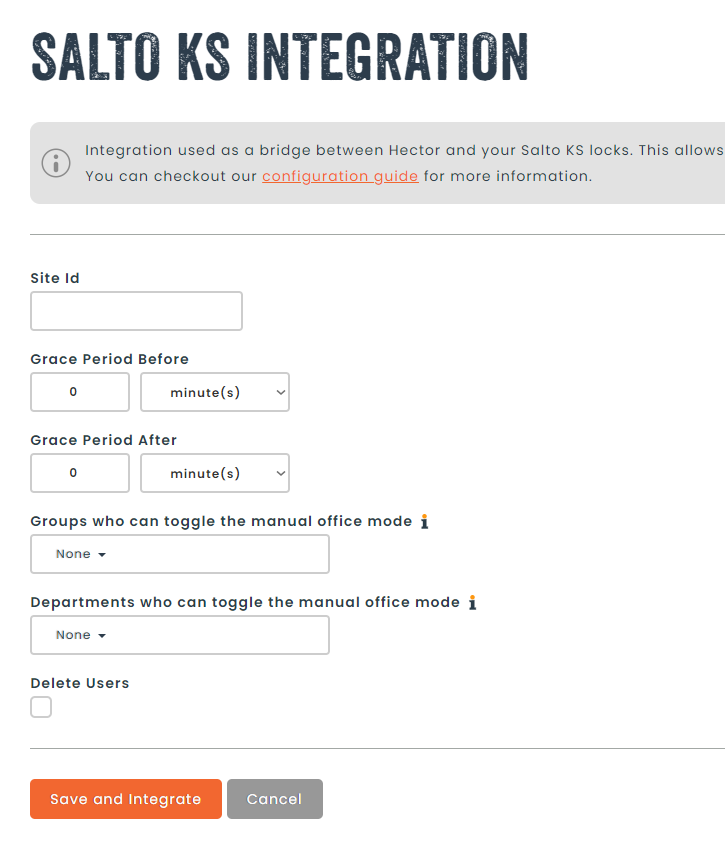
Here is a list of all the fields and how to fill them:
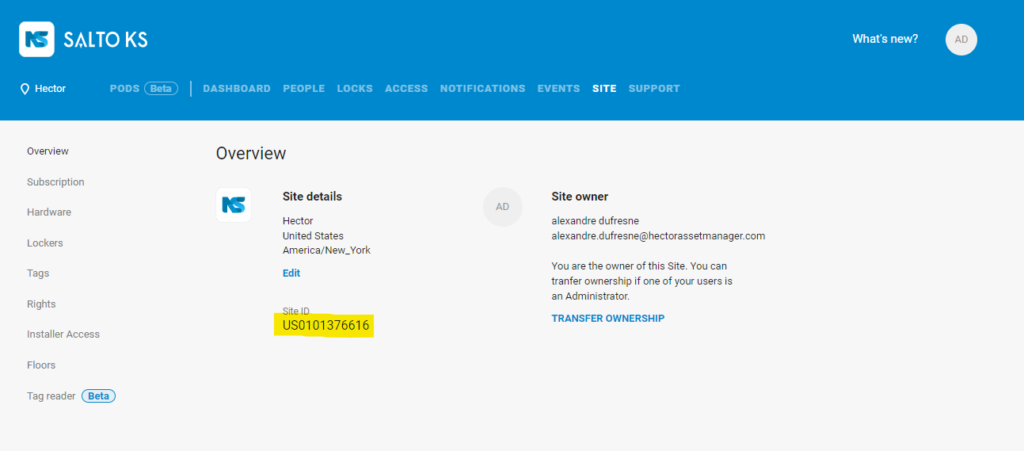
- Site Id: This can be found in your Salto dashboard. Go to the Site section and the Site Id will be visible
- Grace Periods: These are configurations of your choice that will decide de length of time before and after the real time of the loaner the user will be able to unlock the door. By default, these are configured to 15 minutes for a seamless integration to Hector. For example: in Hector, reservations can be made by increments of 15 minutes. So if a user is in front of the door at 10:05 and decides to book his reservation on the spot, the first timeframe that will be available to him will start at 10:15. This 15 minutes grace period will mean he will still be able to enter right away, despite being 10 minutes early.
- Groups/Departments who can toggle manual office mode: Manual office mode if a permission you can give your Salto users to allow them to unlock a door for the duration of their reservations. All a user needs to do to activate it is to present their tag to the door while holding the inside handle down. This can be useful to for a professor when he wants to unlock a door for his whole class and not have to unlock whenever anyone wishes to enter. Since it is more responsibility then a normal user should have, you can restrict who has this permission by groups AND departments.
- Delete Users: Choose if you wish to delete your Salto users who are no longer part of Hector. This can be used if you don’t want extra users polluting your Salto environment.
Once all the fields are completed, press the Save button at the bottom. It will now appear as if the integration is up and running, but it’s not the case yet.
Creating a Salto Account
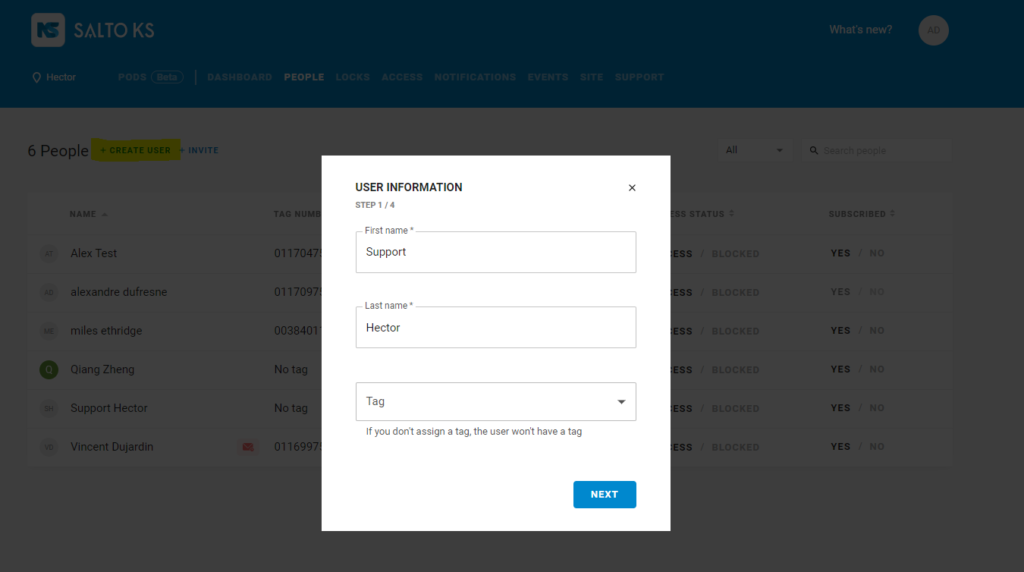
In order for us to be able to make changes to your Salto environment, you will need to add a Hector user to it. Go to your Salto dashboard, in the People section and click Create User. You can name it how you prefer. We suggest something clear like Hector Support. You don’t need to add a tag to it. Press Next.
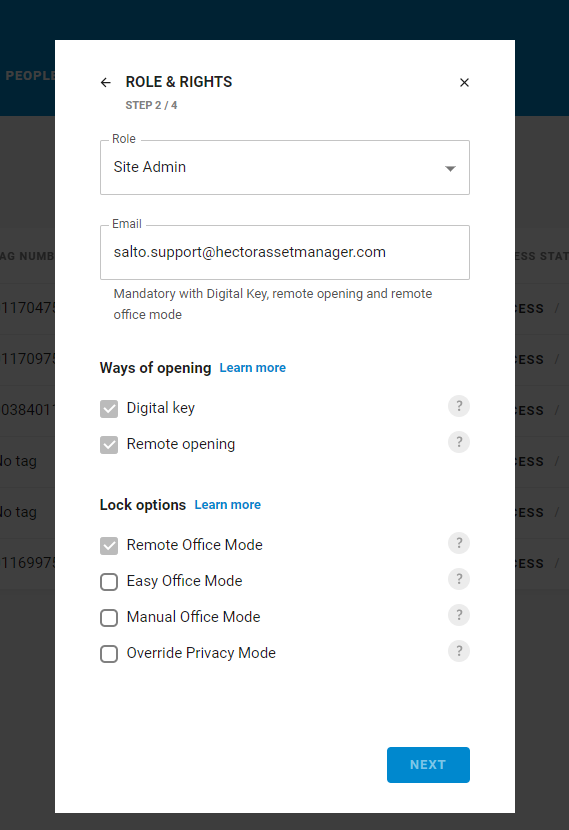
The role will need to be Site Admin and the Email is:
Leave the rest of the options untouched and press Next.
Don’t assigned it any access group and press Next.
Review everything to make sure the information is correct, then press Create.
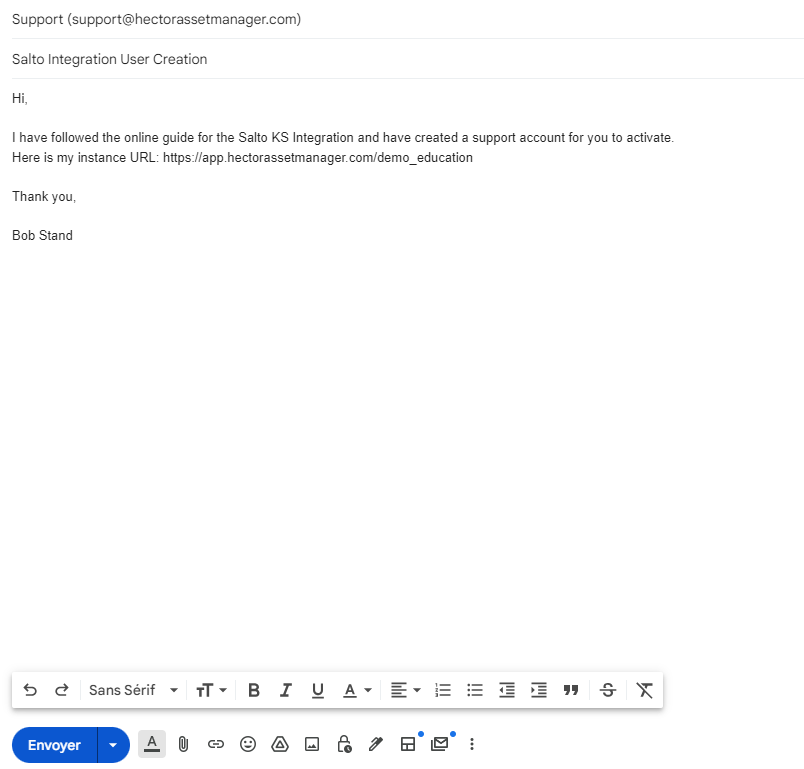
You will then need to contact our support via email at:
The subject should be:
Salto Integration User Creation
In the body, you should specify that you have followed the guide and have created a hector support account in your Salto environment that we need to activate. Also include your Hector instance URL.
From there, we will take charge of your demand and you can expect use to write back when the support account is going to be activated
Users & Locks
In the mean time, you can do the final step of the integration: create a link between Salto and Hector for the users and the locks/places.
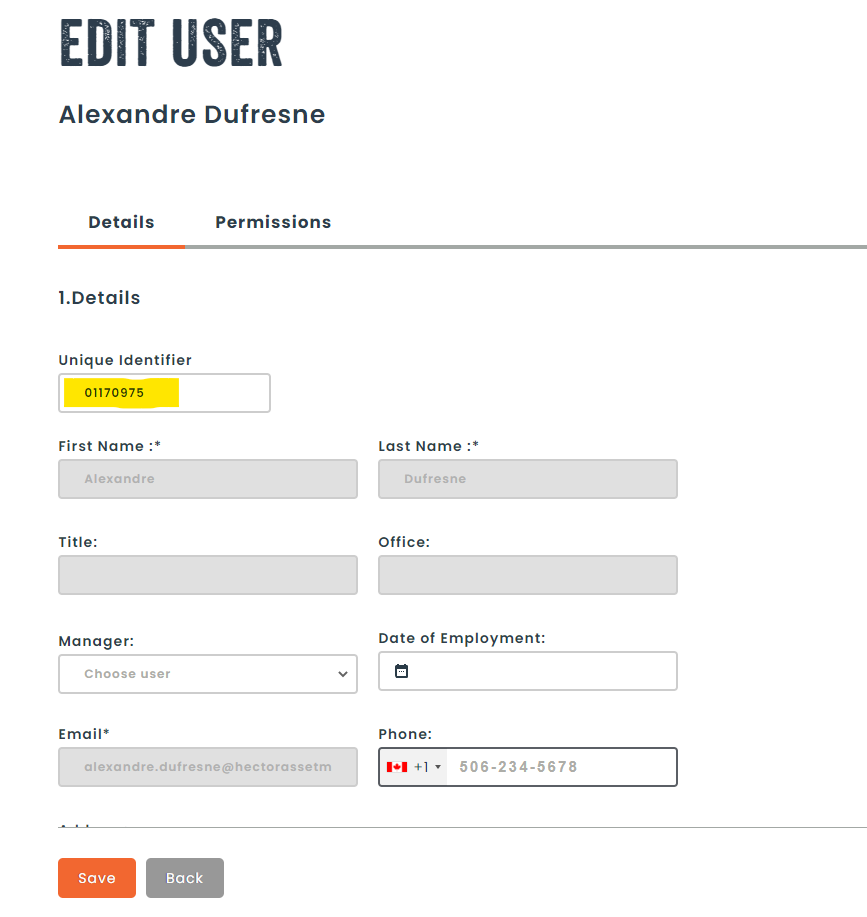
Your Salto users emails and tags are the equivalent to your Hector user (their email) and their unique code (tags). Make sure every user in Hector has the tag you will want them assigned in Salto. Hector will create the users in Salto if they don’t already exists and it will assign it the right tag if it exists.
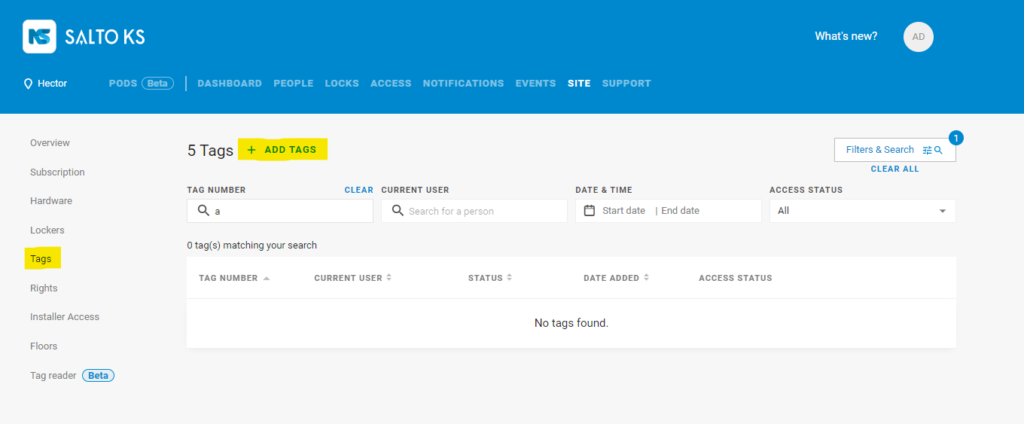
**Tags cannot be created by Hector, you will need to create them in the Salto dashboard. To do so, go to the Site section and press Tags in the left menu. From there, press Add Tags to add your tags.**
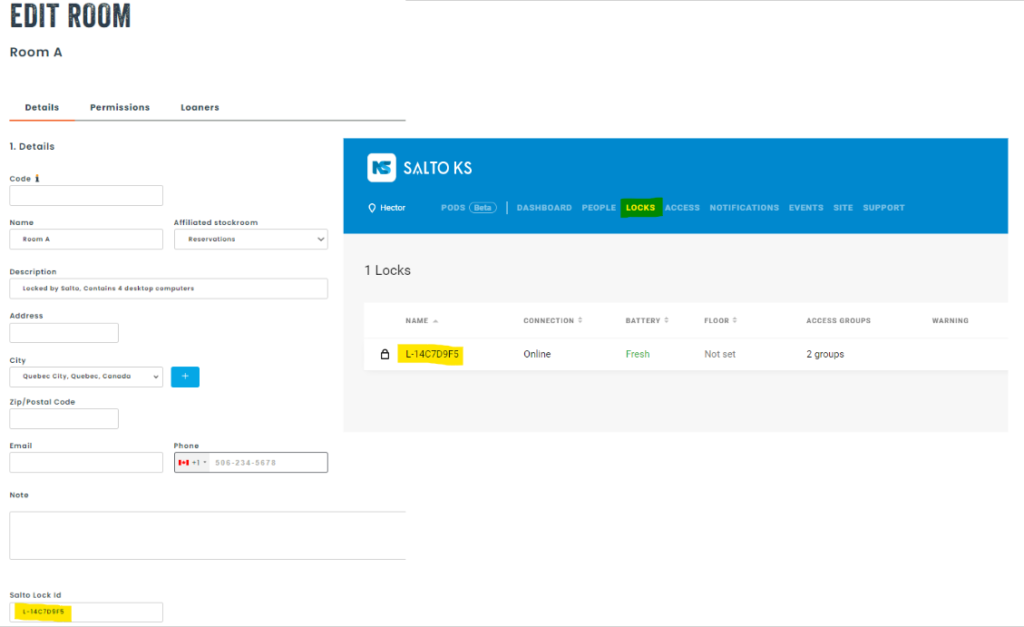
Finally, you will see that activating the integration has created an attribute for the places in Hector called Salto Lock Id. You can fill these with the right Lock Ids found in your Salto dashboard, in the Locks section. The lock id is the name of the lock.
When all of your user and lock information is correctly entered, you will need to sync it with Salto. To do so, go back to the integration list in Hector and find the Salto integration again. Pressing the reload icon will tell Hector to synchronize all the information you have entered. You can use this reload every time you enter new information relevant to Salto.
**This button will have no effect until we have activated the support account in your Salto environment. We will make sure to press the reload button when we activate the account.**
Final Word
You have now completed the setup for the integration. You should start seeing access groups in your Salto dashboard with the following naming: Hector_{reservation reference number}. Hector produce access groups for the reservation 1 week in advance and will remove the outdated ones.
We hope this guide was helpful!