Step 1
Navigate to the software section from the Software menu. Once inside, you will see a list of software in your instance. If you haven’t created any software, you can do so using the “New Software” button..
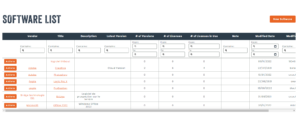
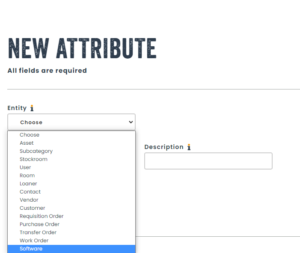
It is important to note that you can also create attributes to better represent your needs.
Step 2
Once inside the new software screen, you will find many fields that will help you gather information regarding the software you are adding, as well as the main users of this software inside your organization.
- Software Title : The name of the software.
- Software Manufacturer : The manufacturer of the software.
- Software Description : A description of the software features.
- Department : Users of the software in your organization.
- Note : Any additional information regarding the software.
- Files : Add any relevant files for the software.
Once all fields are filled, you can click on the “Save” button.

Step 3
After creating the software, you will see a card including the details you entered, as well as sections for versions, purchases and assets.
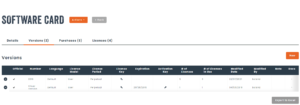
To purchase a software, it is essential to have a version per software. If you only have one version for this software, you can enter main as a version number. In the example below, we added the version 2016 for Microsoft Office.
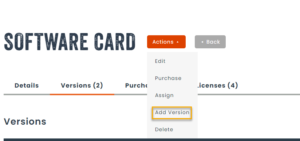
To add a version, click on the + next the title and then click on “Add version”.
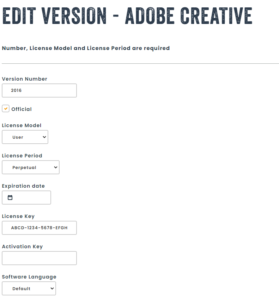
Fill in the information on screen.
- Version number : Enter a name or number for the version.
- Official : The official flag allows you to indicate this is the official version of the software used in your organization. You can have more than one official version.
- License Model :
- User: The license is assigned to a single user.
- Floating/Shared: The license is floating and can be used by multiple users/devices.
- Device: The license is assigned to a device (see inventory assets).
- License Period :
- Perpetual : The license is perpetual and is owned by your organization.
- Subscription: The license is part of a subscription and does not belong to your organization.
- Expiration Date : The expiration date for this version. Useful for subscription.
- License Key : The license key for this version. If this version of the software has multiple activation keys, you can enter them when creating software assets for this version.
- Activation Key : The activation key for this version. If this version of the software has multiple activation keys, you can enter them when creating software assets for this version.
- Language : The language of the software purchased.
- Note : An internal note regarding this version of the software.
- Files : Relevant files for this version of the software, which could be release notes, new features or other information from the vendor.
Once the version is created, it will be displayed in the table of versions for this software.

A version can be viewed, modified, purchased, assigned or deleted with the help of the action menu.

The next step is purchasing a software. You can read more about this step in our main article on software purchases.