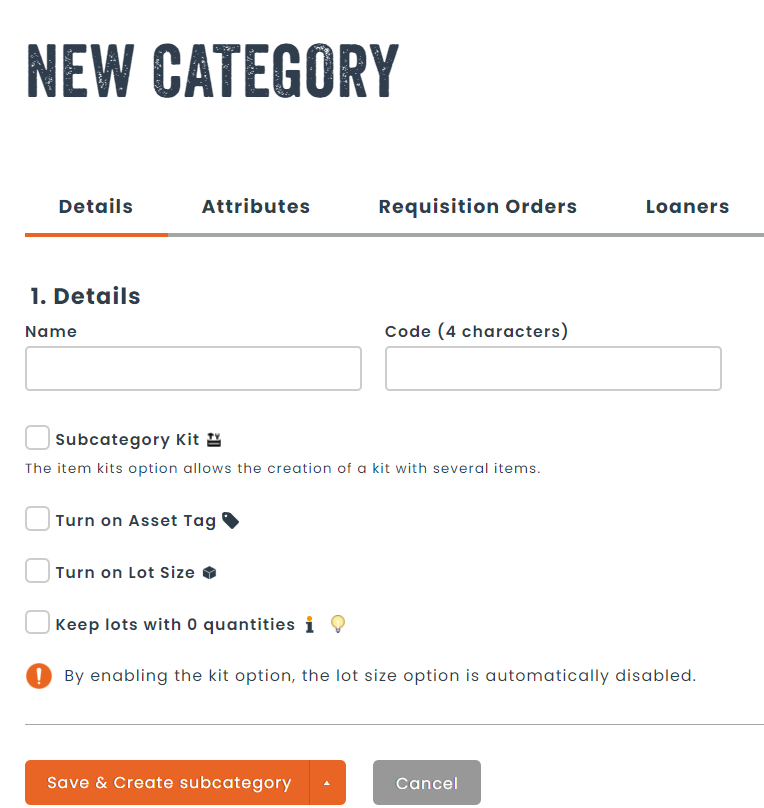
Step 1 : Create a category for your kits
To begin using kits, you must first setup a category with the “Part Kit” checkbox turned on.
Step 2 : Create a part kit
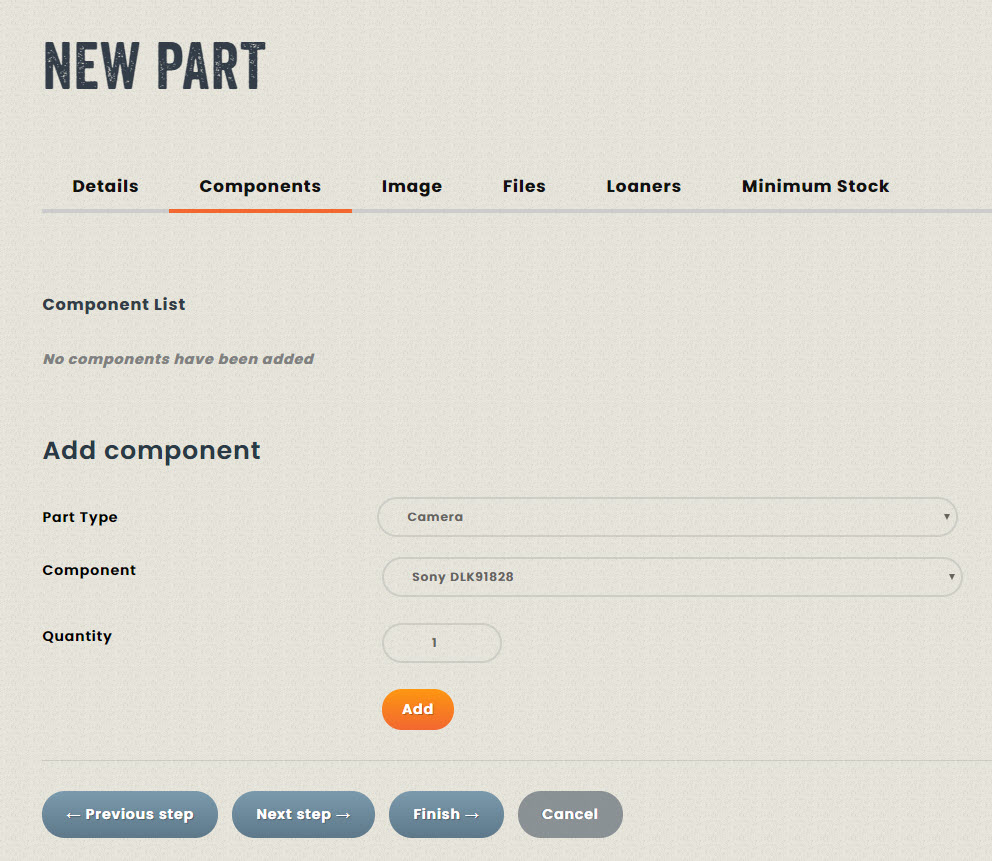
When creating a part from a category that has kits enabled, a new components tab will become available, allowing you to add components to your kit.

If you wish for components to be added when creating assets, you can leave the component list blank.
If you’d like components to be created automatically by Hector, you can add components to the part definition.
In this example, a camera, microphone and projector were added to the part definition, which will allow us to create the assets automatically.
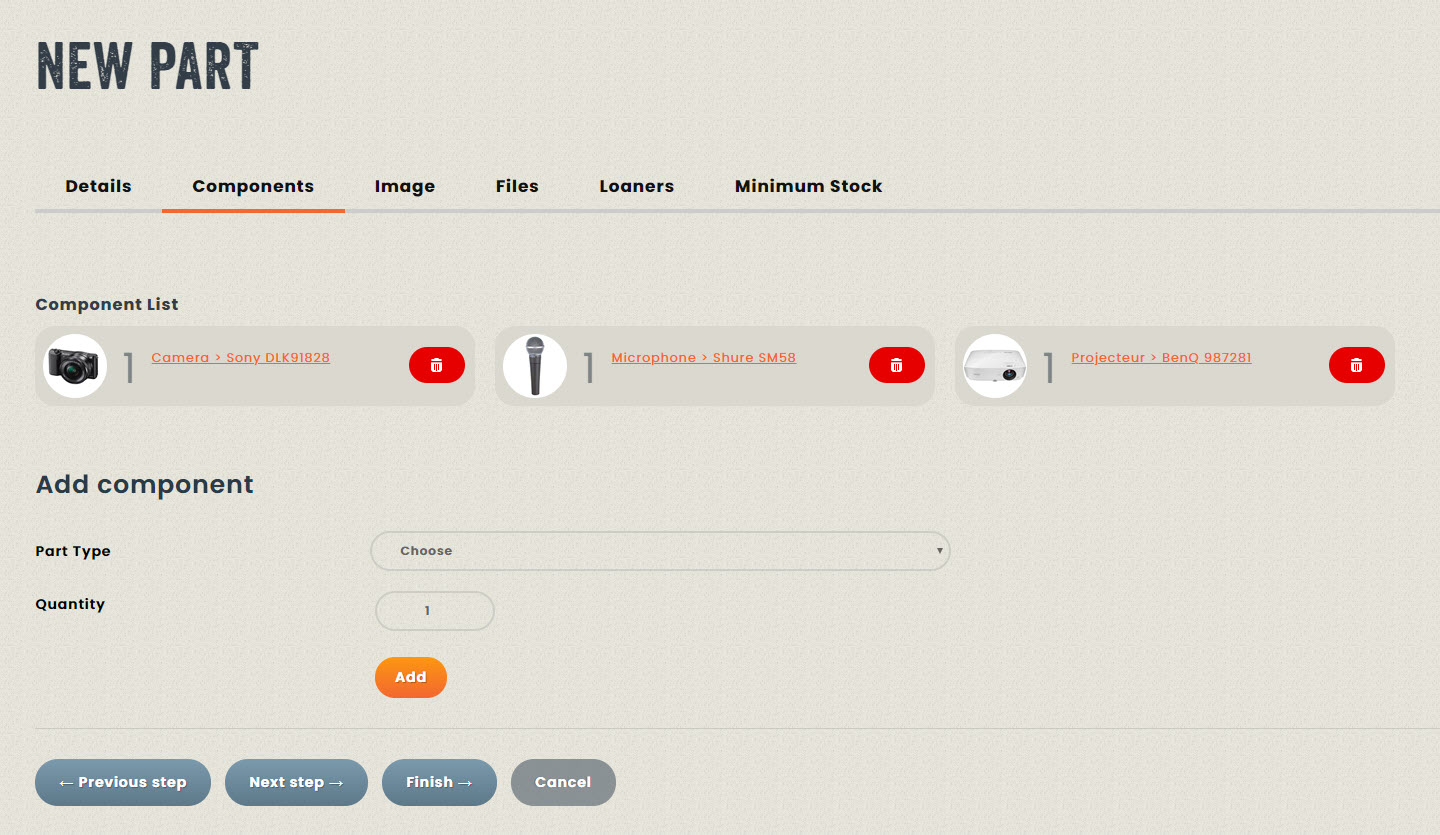
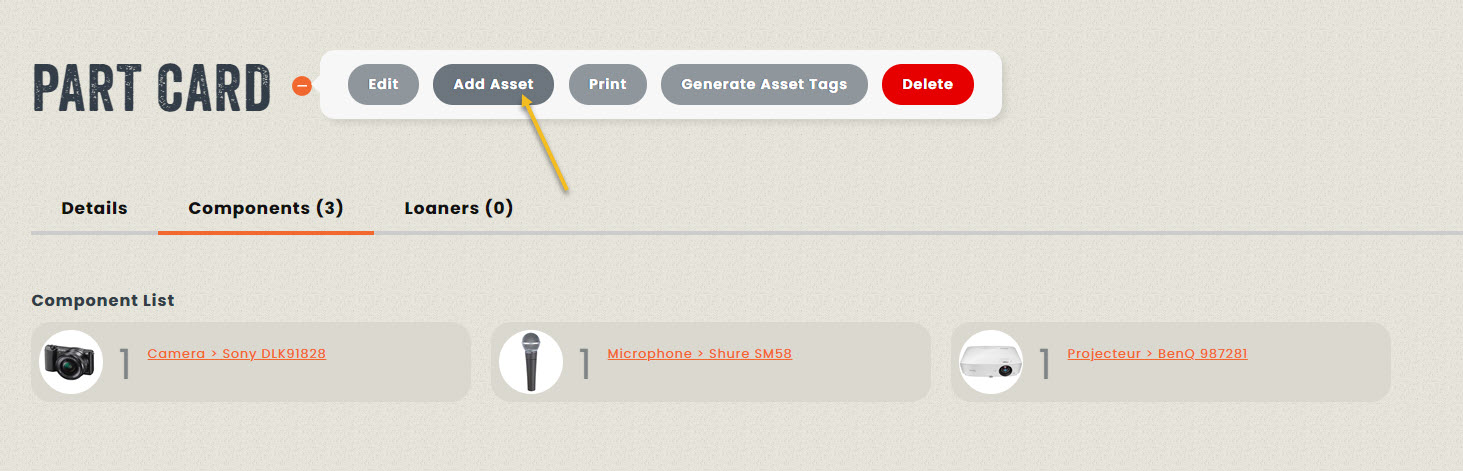
Once we’ve saved our part, we can create an asset directly from the part view screen by clicking on the + button and then on the “Add Asset” button.
Step 3 : Creating asset kits
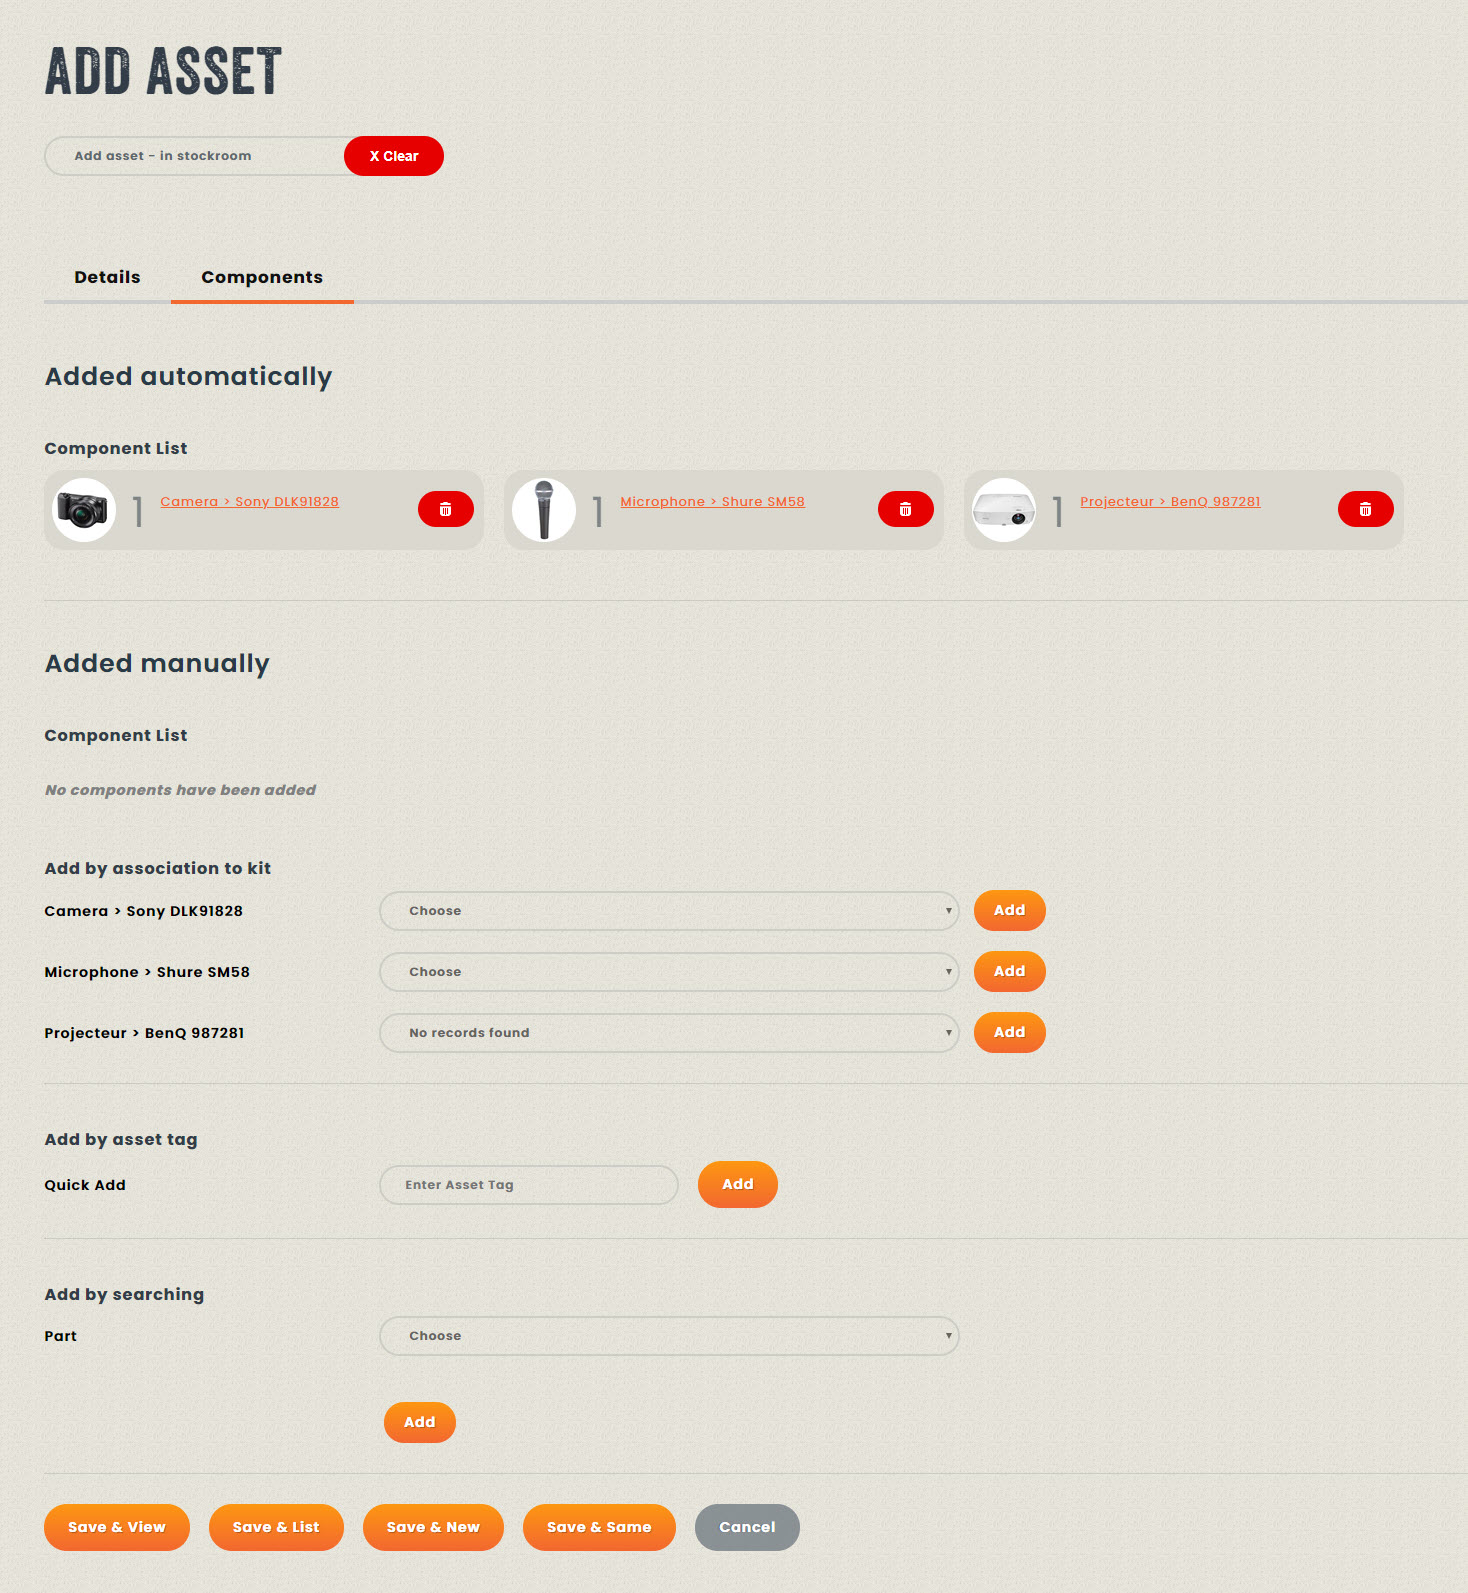
After filling out the details tab, we can click on the components tab to see what will be created automatically from our part definition. If we wish to add our components manually, we can remove the components that were added automatically using the remove button.
If we had left our component list empty in the part definition, no assets would have been added automatically, saving us a step.
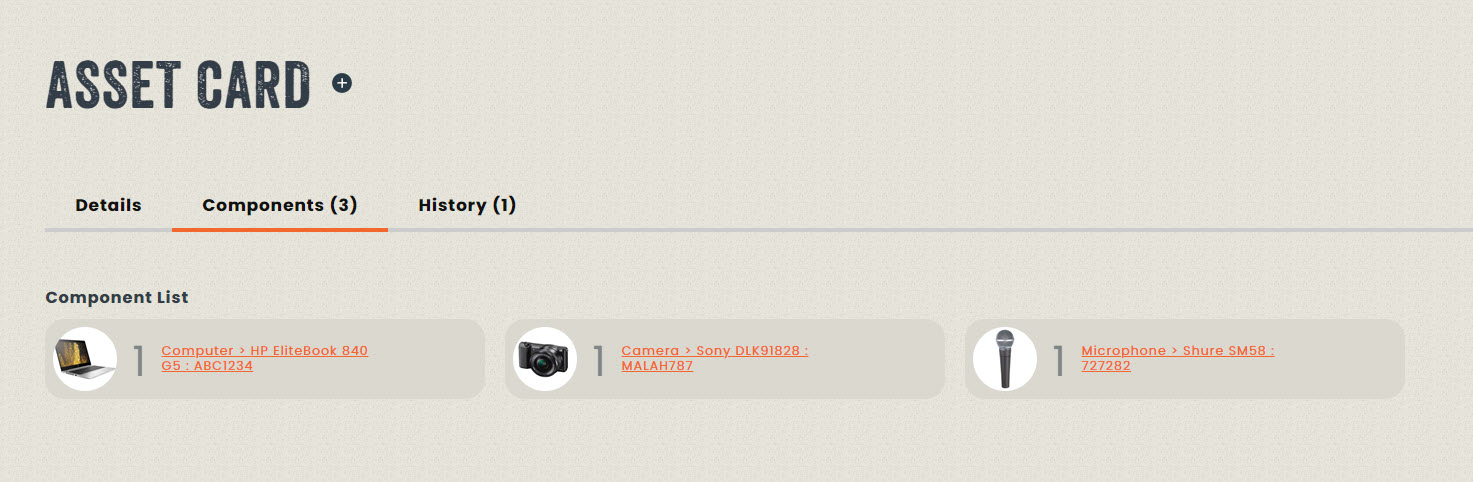
In this example, three assets were added manually, a camera, a microphone and a laptop computer.
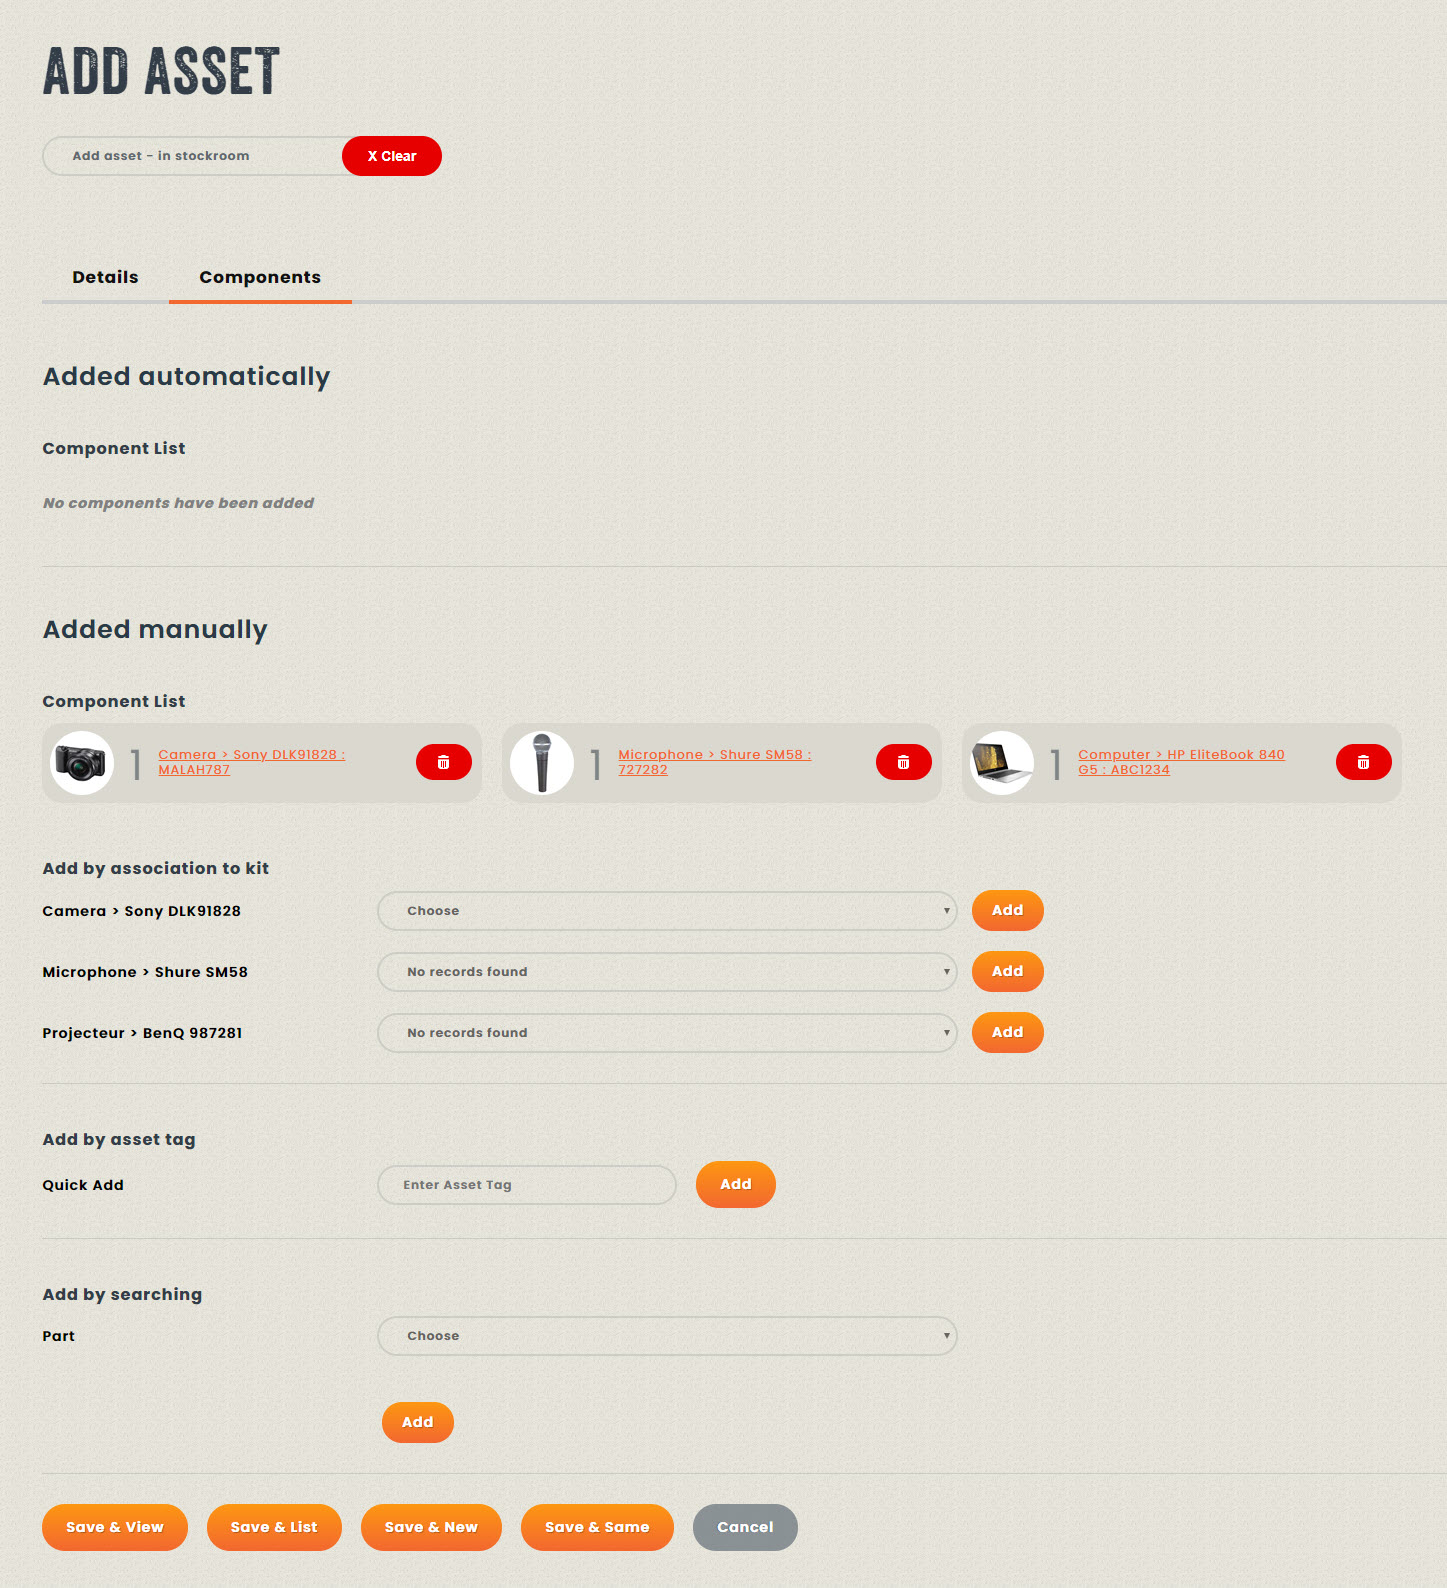
Once completed, click on the Save & View button and you can see the asset as well as its components.