SAML, which stands for Security Assertion Markup Language, is a standardized way to handle user connections across multiple apps from one centralized user database. While this is good for the users who only need to remember one password, it is even better for multiple security reasons such as Hector not having to store any passwords or the possibility to use security features such as multi-factor authentication already configured by your organization.
How to set up SAML
There are a wide variety of software applications that implement SAML, so there might be a specific requirement missing in our configuration preventing you from making the connection work. If this is the case for you, do not hesitate to email our support team at [email protected] and we will try our best to include your requirements as soon as we can.
First, you are going to need to be connected as an admin in Hector and navigate to the Settings > Security section.
Select either the “General SAML” or “General SAML V2” authentication method.
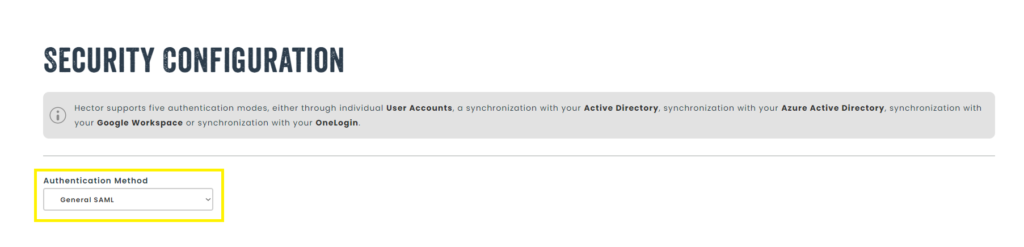
The difference between the two authentication methods is that the V2 has an extra signature which makes it the exchange even safer by encrypting the information. It is not required for SAML to work so if you do not wish to add this signature, simply chose the first authentication method.
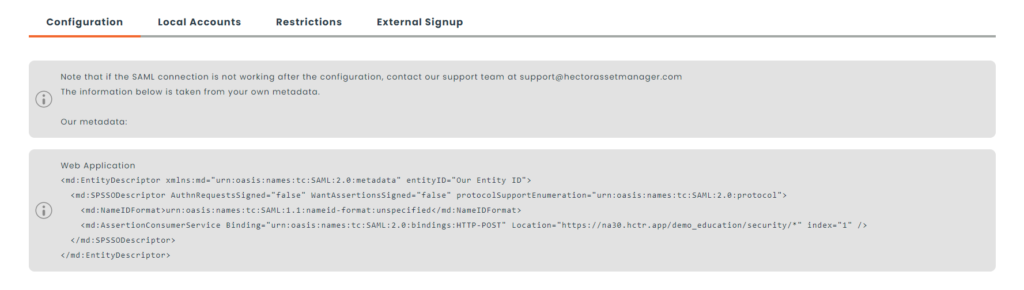
On the top of the configuration section, you will see our metadata, which is an XML encoded text containing the necessary information you need to give to your SAML software in order for the connection to work. Most softwares accept a copy and paste of the XML text and can automatically fill out the information. It is worth nothing that the XML text varies depending
on the authentication method chosen.
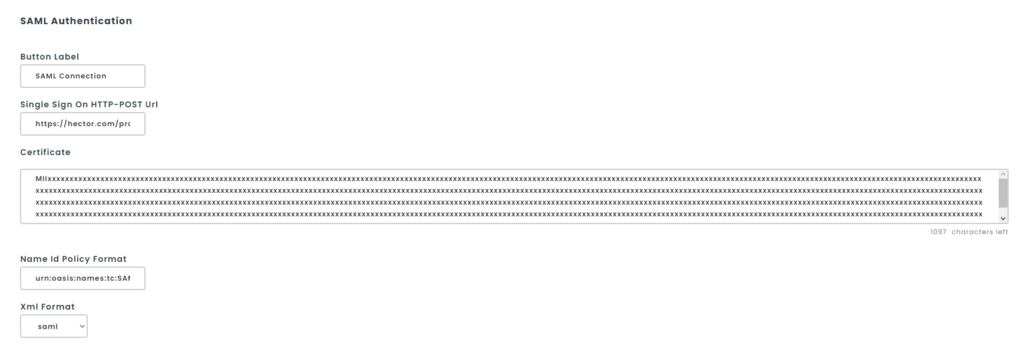
The next step is to do the reverse. Usually, your software will generate its own metadata for you to give us. In this context, Hector is the SP (service provider) while you are the IDP (Identity Provider), so if the metadata contains two sections (one for the SP and one for the IDP), the following informations are going to be taken from the IDP section.
- Single Sign On HTTP-POST Url => The “Location” value of your Single Sign On Service (HTTP-POST).
- Certificate => The X509 certificate.
- Name Id Policy Format => Value of “NameIDFormat”. If unsure, put the value “urn:oasis:names:tc:SAML:1.1:nameid-format:unspecified”.
- Xml Format => Choose the format of the response sent by your software. If one doesn’t work, you can try the other.
- Button Label => What label you want your users to see on the button they press to connect using SAML.
User Attribute Mapping
When a user successfully authenticates on your SAML portal, some information about that user are going to be sent back to Hector so that we know which user to connect. In SAML, we call the information returned “Attributes”, which are a list of attribute name => attribute value. For example:
- Firstname => Bob
- Lastname => Stand
- Email => [email protected]
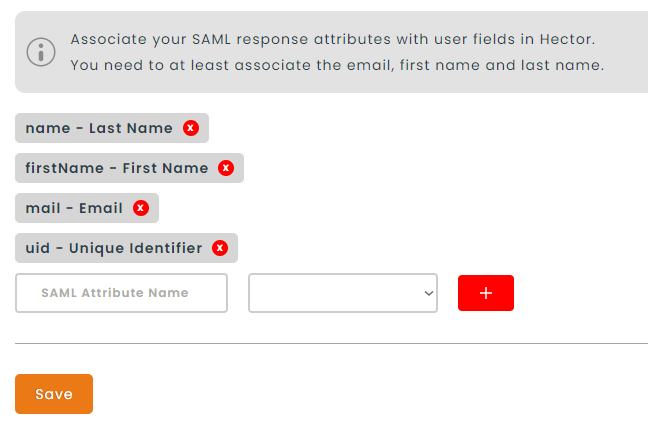
In Hector, we only accept the mapping of four attributes for now, which are the first name, last name, email and unique identifier. We plan to add more in the future. In the configurations, we ask for a SAML Attribute Name, which is the name or friendly name of the returned SAML attribute and there is a selector to choose to which Hector attribute you want the mapping to be done.
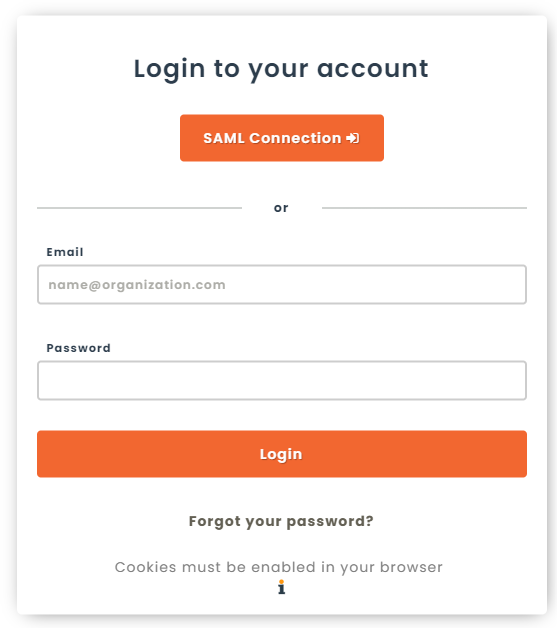
Once the mapping is complete and all the other informations are entered, save those configurations and you are ready to use the SAML connection. You will be able to see and test your new connection button if you logout.