With Hector, it is possible to create Spaces that are subcategories of Places. This can be very useful for listing apartments in a building in order to be able to track the assets assigned to the building and to certain apartments.
In another context, the Spaces will be useful to book workstations or single seats (due to a maximum capacity) in premises!
Prerequisites
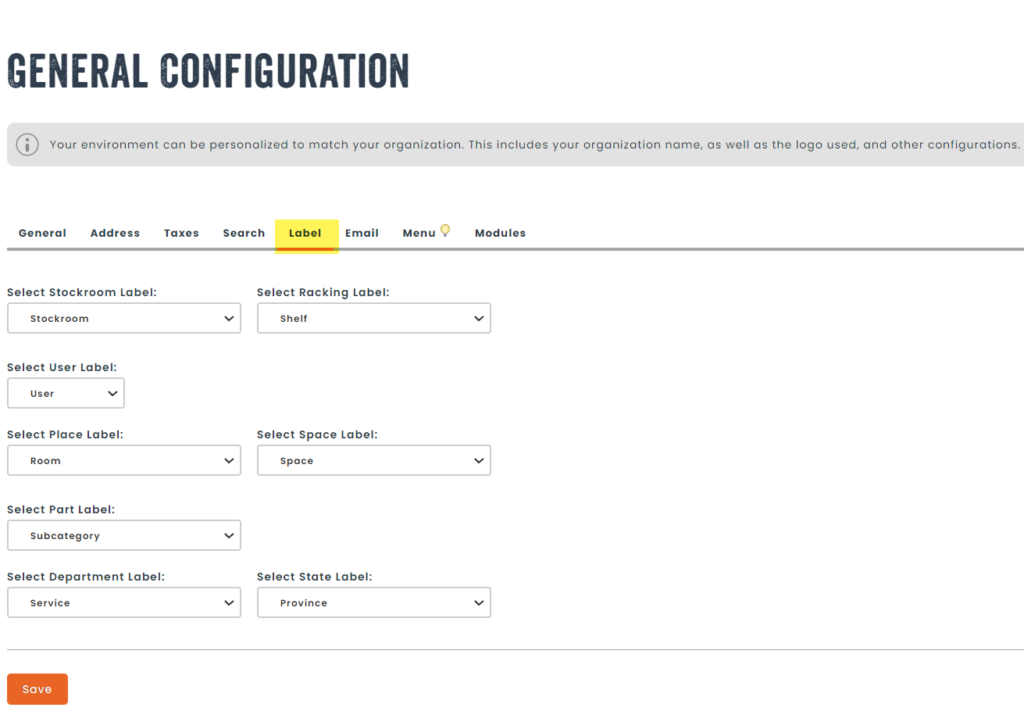
Step 1 – Rename your « Places » and « Spaces » labels
- Go to the “General” tab under the “Settings” menu, scroll down and select a new label name option.

Step 2 – Create a Space
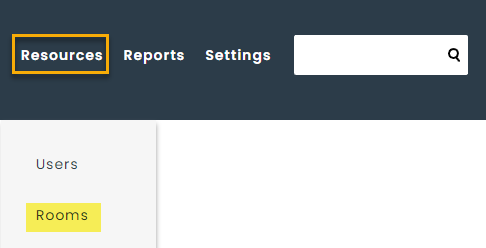
- Once logged in to your Hector account, press on the ‘’Rooms’’ tab under the ‘’Ressources’’ menu.
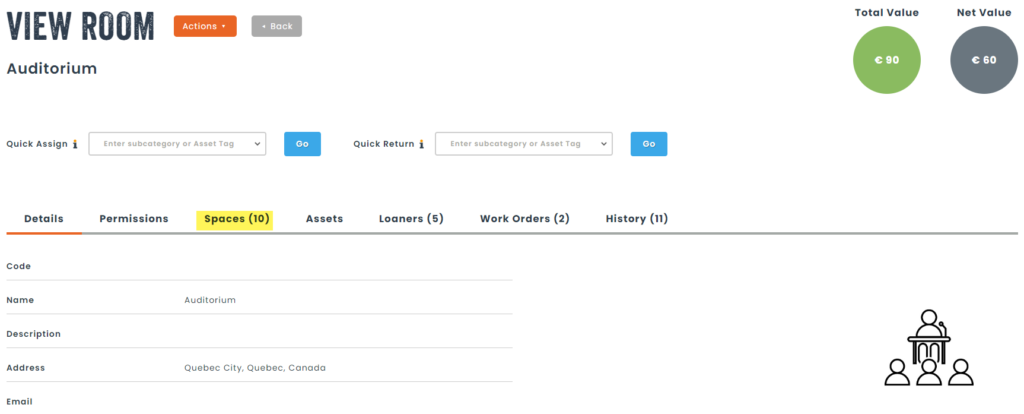
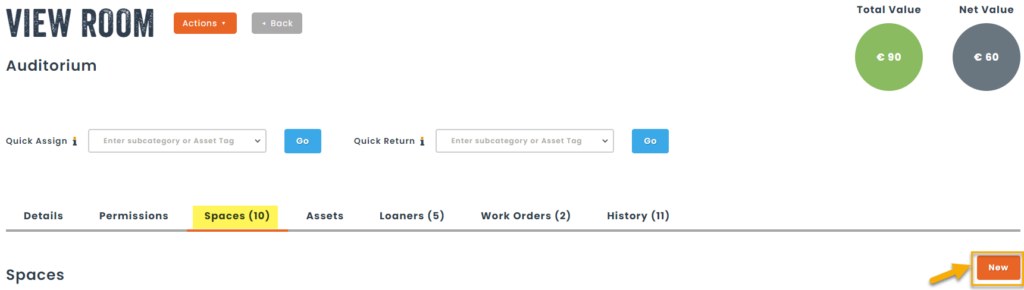
- Click on an already created Place to access it. You will then see a ‘’Space’’ tab, click on it and then click on ‘’New’’

- Once on the Space creation page, you can modify the Place under which you will add your Space (The Place on which you clicked appears by default).
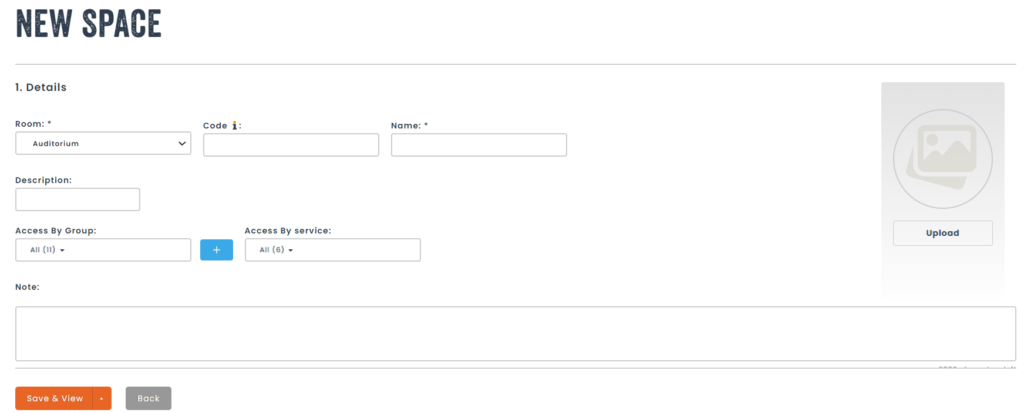
- Fill out the fields, select the departments having access to the Space in case of reservation and click on ‘’Save’’.
Step 3 – Assign assets to a Space
- On your asset sheet, click on the action button «Assign to a Resource».
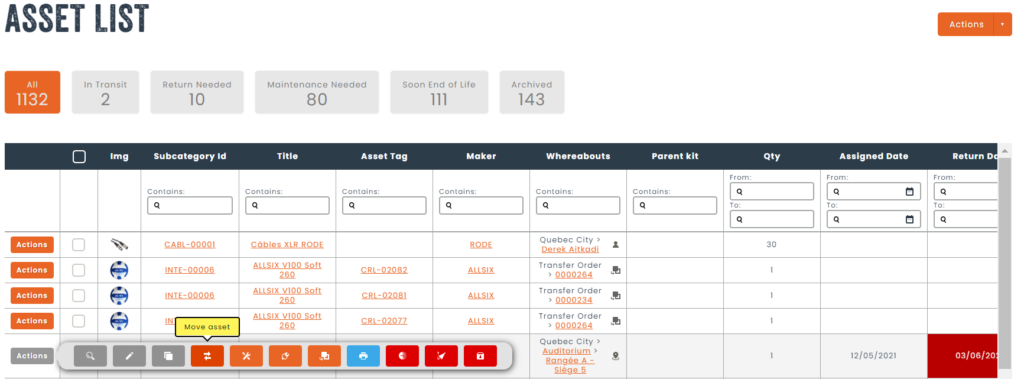
- Choose the Place where you want to assign the asset. You will then see a selection option to choose the assignment Space.
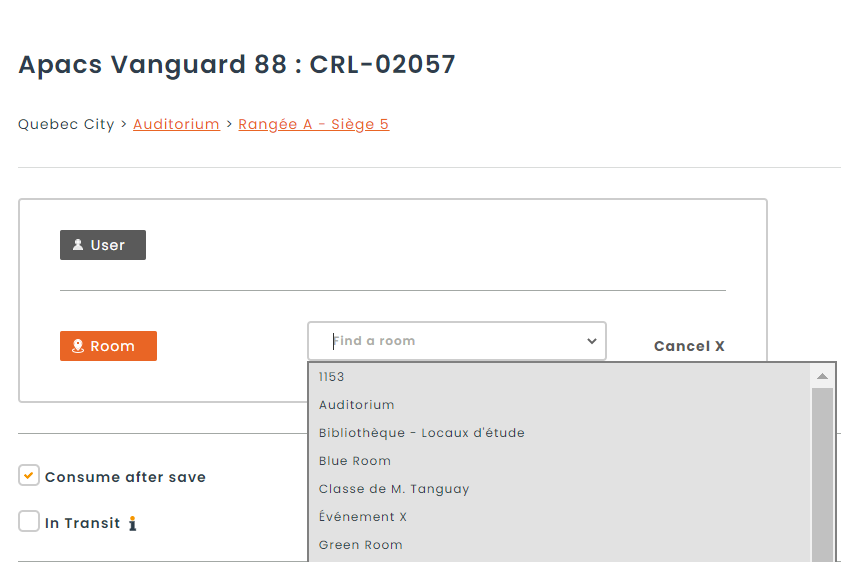
- Then, click on ‘’Save’’. Your asset will then be shown on your Space sheet.
Also, if your loaner module is activated, it is possible to book Spaces in the loan form.