You would like to set up a reset schedule for when users are allowed to make reservations in your organization? Do you want users to provide key documents before being able to make reservations?
Here are the steps to set up an access reset frequency for loans in your Hector environment.
Required before starting:
- Have a Castle subscription plan
- Have the loan module enabled in your instance
- Have access to the Settings section
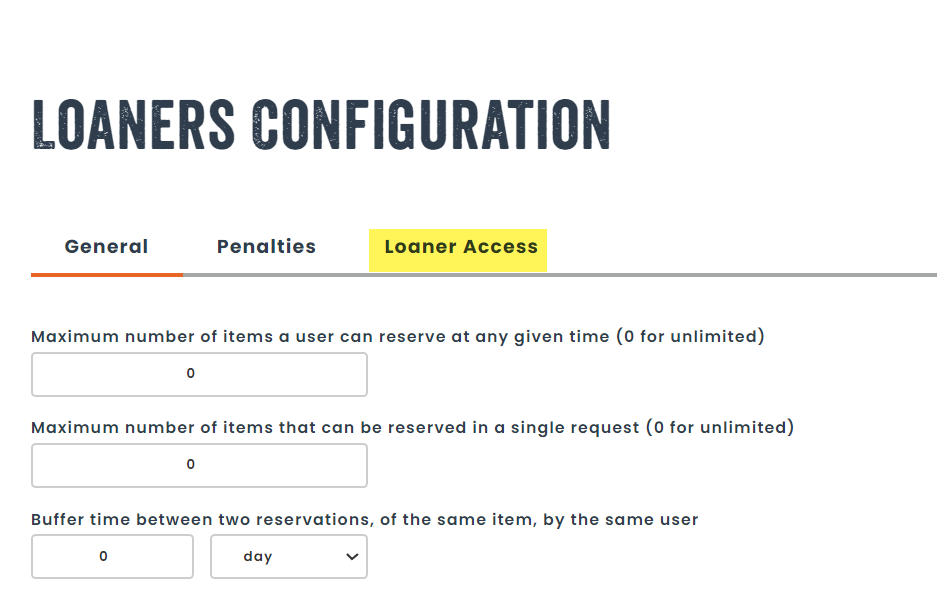
Step 1:
From the Settings menu, select the loaners setting.

Step 2:
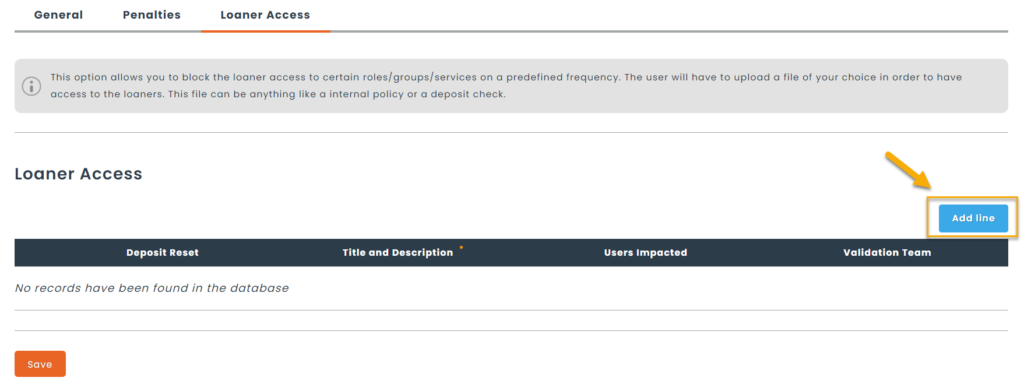
On the loans configuration page, click on the Loaner Access tab.
Step 3:
In the section Loaner Access, select the option Add line.
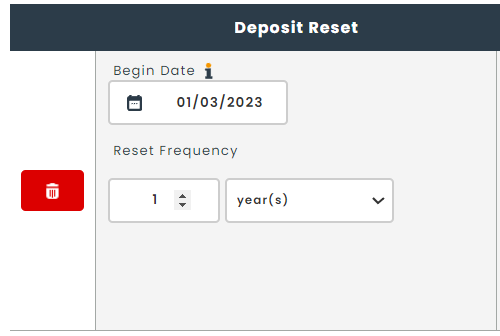
Step 4:
You can then set the start date of your reset frequency. Impacted users , based on your filters, will receive a request to provide new documents.
Step 5:
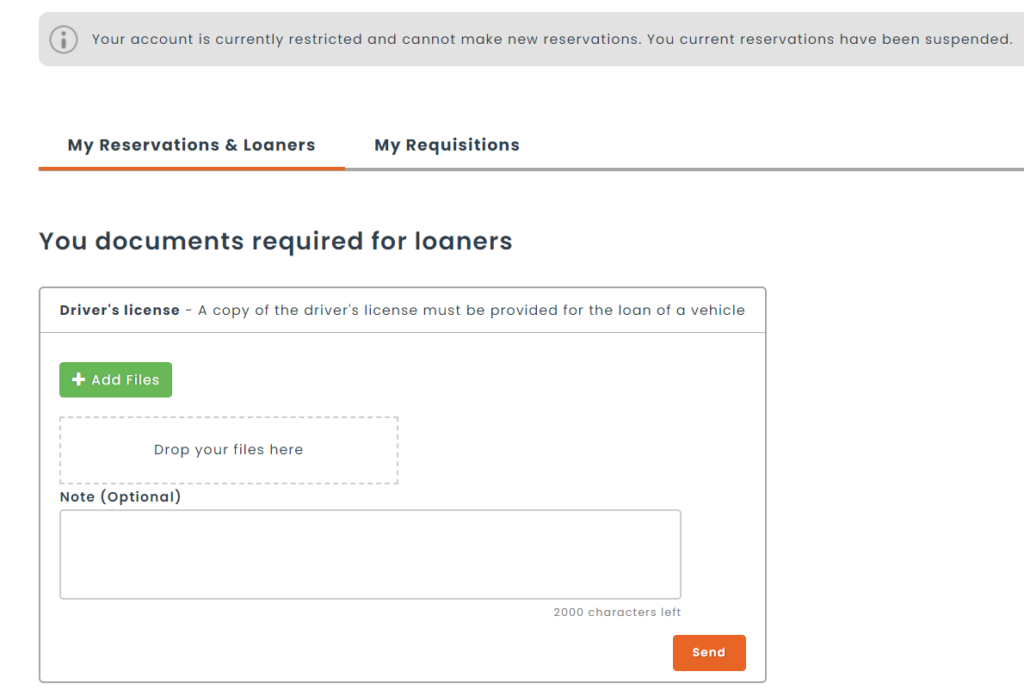
Then, indicate the document title required from the user, as well as a brief description.
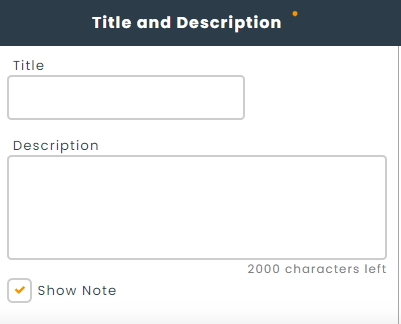
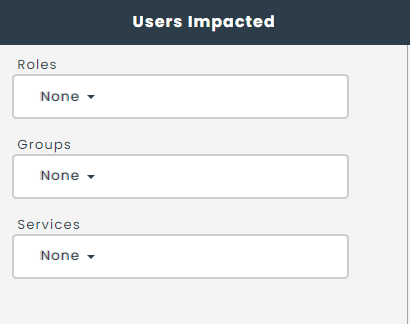
You will also be able to select the users impacted by this rule using roles, groups or services.
Step 6:
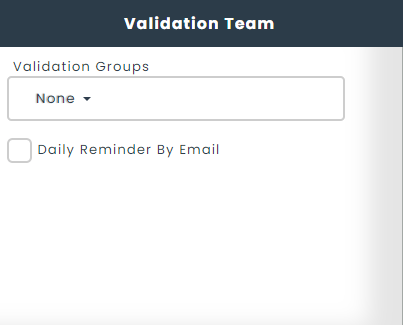
The last step allows you to indicate which group of users will be responsible to approve pending documents. They can also receive daily notifications of all incoming access requests.
Step 7:
You can then complete the form and save. If your dates trigger a reset action, an email will be sent to all impacted users. These users will not be able to make any reservations until an approval is made by your validation team.
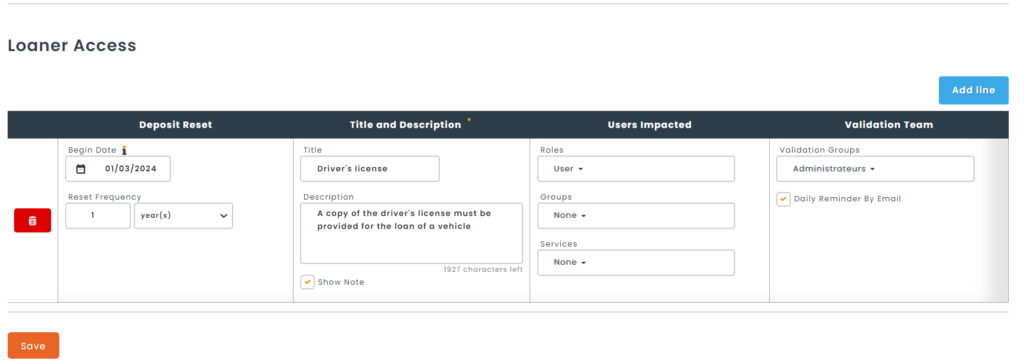
You can make as many different requests for access reservations as you want simply by selecting the tab Add a line.
Step 8:
Users who have been impacted by your request will have a notification appear on their home page asking them to provide the requested documents.
Step 9:
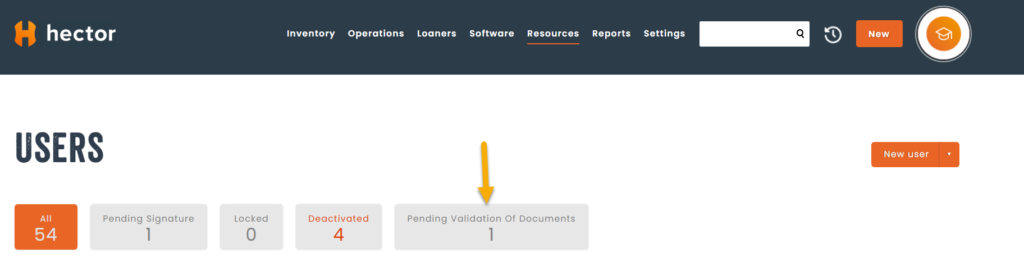
Once the requested documents have been sent to the users, only the members of the validation group will have to approve the documents.
To do this, select the Resources and Users menu, and you will find a new tab Pending validation of Documents.
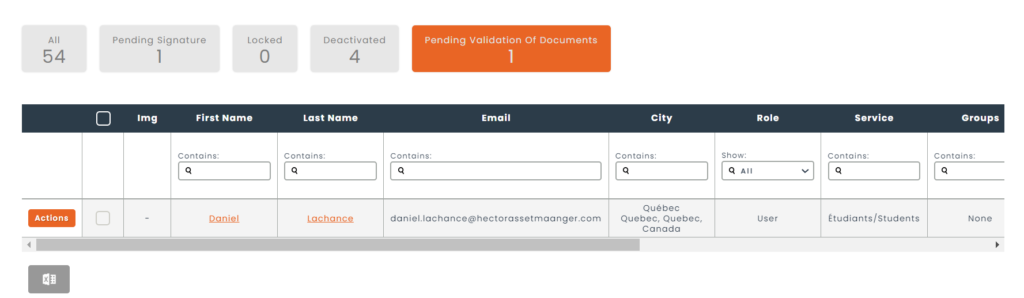
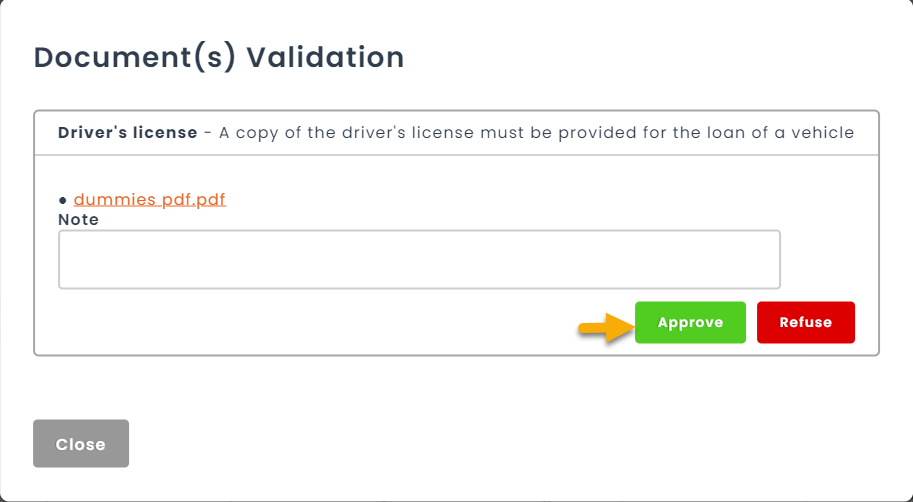
After validating the documents, click on the button Actions and select the icon Take Action in order to approve or refuse the request.
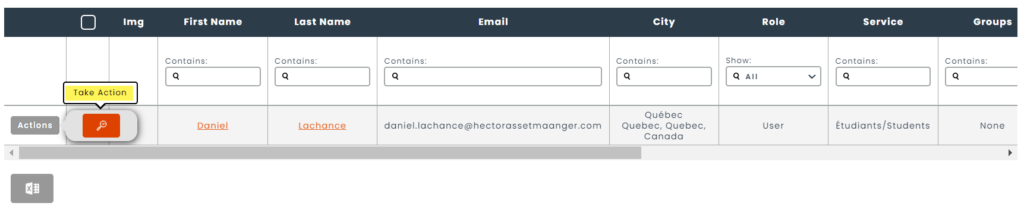
You will be able to approve or reject the documents sent by the user. If rejected, the user will receive a new notification and will have to return the home page to update the document or fix any mistakes.

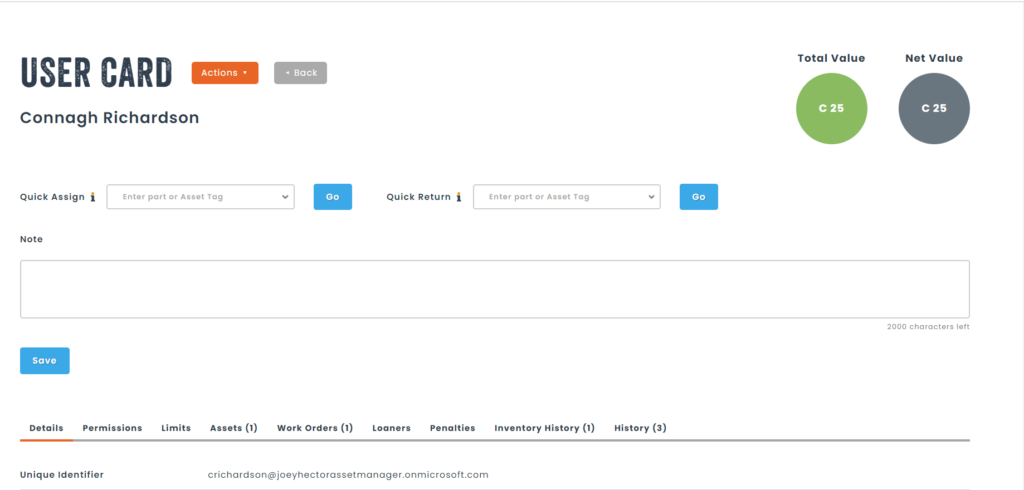
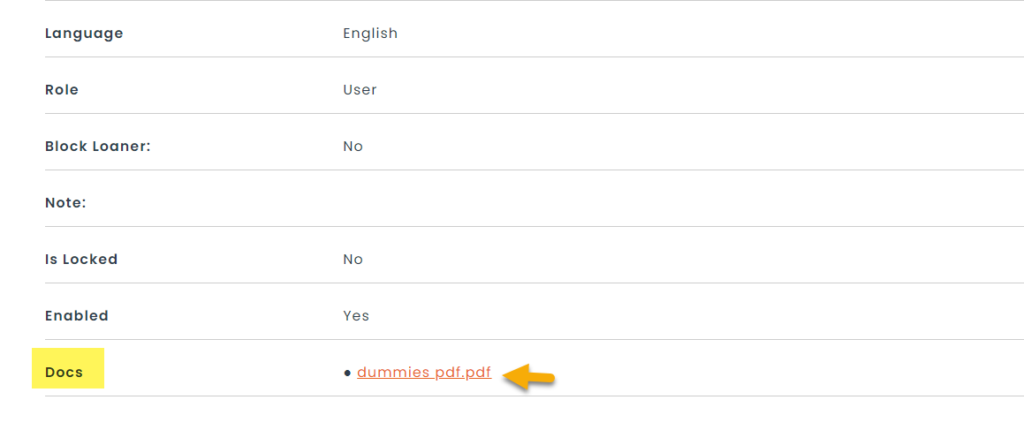
A copy of the document(s) will then be available for consultation on the user’s card.
If you’d like to use this feature but your plan does not allow it, please contact your account manager or send us a message at [email protected] !