Notifications are an important part of asset managing. This is why Hector is adding a new way to implement notifications, with the goal of including almost all possible scenarios you would want to be notified for.
This online guide will show you step-by-step all you need to know in order to configure your own notifications.
1. Email Templates
The first version of these notification will only include the possibility to send emails to notify. In the future, we are looking to add things like SMS or in app notifications.
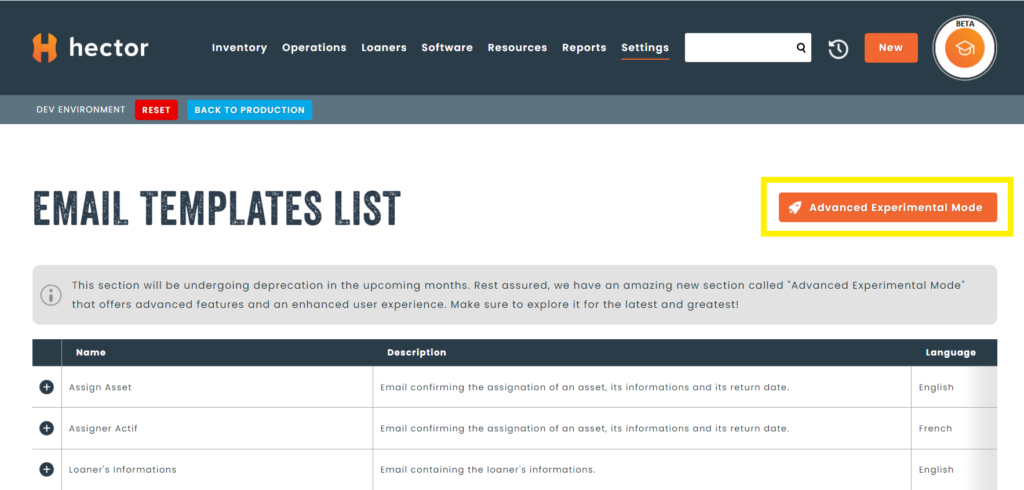
To get started, navigate to the the Settings > Templates section of the menu. Once there, if you haven’t done so yet, you can click on the “Advanced Experimental Mode” to be redirected to the new version of the email templates, which are the ones you will be associating with the new notifications.
You can then click to add a new template and you will be redirected to a page to create a new email template.
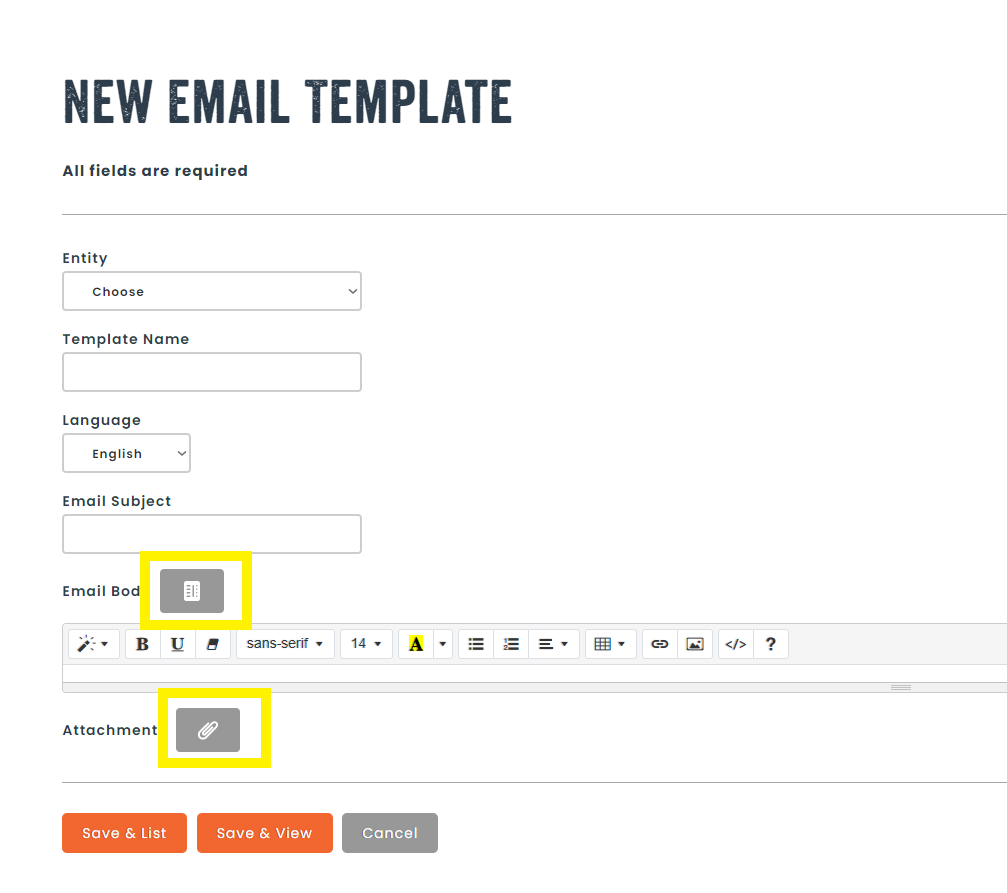
- On this page, you will have to choose an entity for you email template (which has to match the entity of the future notification). Only Loaners, Assets and Transfer Orders are available in the first version.
- You can give your template a recognizable name
- You can choose a language. Later you will be able to translate it in the 2 other languages available on Hector.
- You can then choose the email subject, body and attachments you prefer.
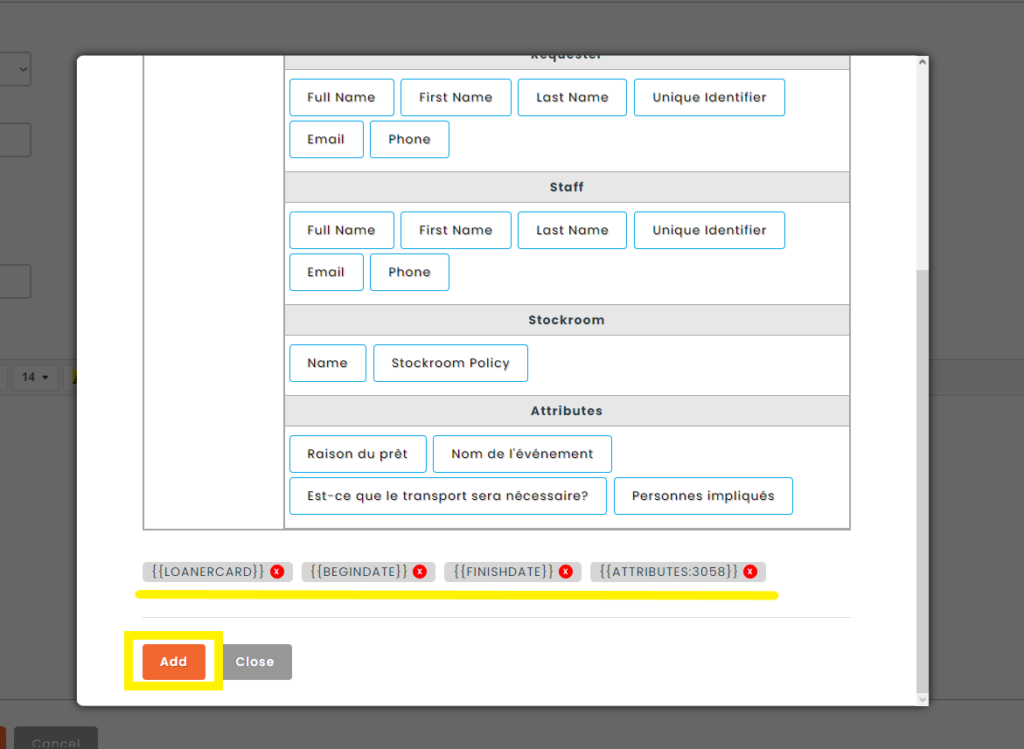
- Clicking the grey buttons will open a list of labels and attachments you can import in the email template, depending on your entity. These labels/attachments will be replace by the right values at the moment of sending the notification
Adjust the visual of the template to your liking, the control will let you do a lots of things with tables, colors, paragraphs, etc. You can also switch to “Code view” if you want to interact directly with the HTML.
Once everything is completed you can save at the bottom of the page.
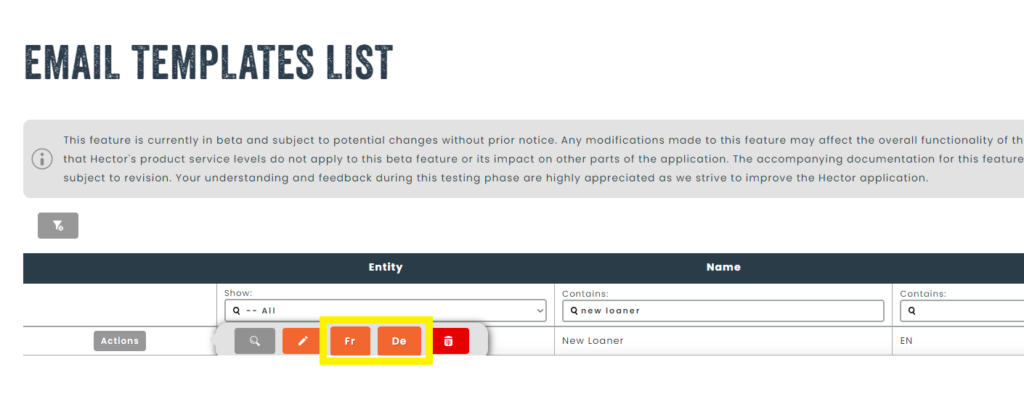
If you want to add a translation, simply go to the list, click the “Action” button of the template you want to translate, and choose which translation you want to create/edit.
2. Notification Templates
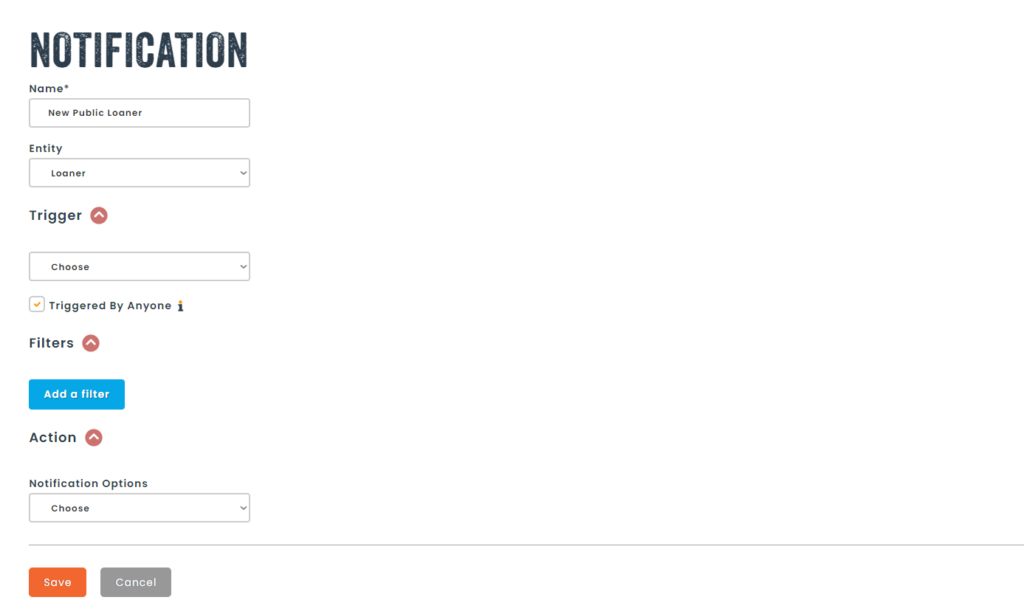
At this point, you are ready start creating your first notification template. First, navigate to Settings > Notifications and you should see the same buttons as the email template section. Click it to be redirected to the new notification section and then click “New”.
You can start by choosing a name and an entity for the notification. Make sure you choose the same entity as your email template if you are following along the guide.
New sections will then appear to complete the template. It should look like this:
2.1 Triggers
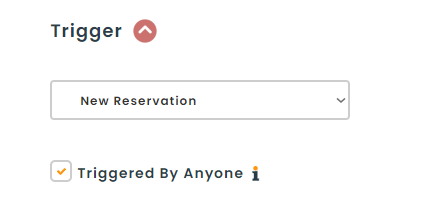
The main element of the notification is what we call a “trigger”. If you open the list to choose a trigger, you will see that a trigger can be basically any action happening in Hector that you want to associate with a notification. For example, if you choose “New Reservation”, the notification will be sent whenever a new reservation is made in Hector.
Some triggers require a bit more configuration:
- Initial and expected values: The notification will only fire if the change goes from the initial value to the expected value.
- E.g. For a late loaner, the trigger would be “Change to the status” while the initial value could be “Any value” and the expected value should be “Overdue”.
- “Since” : How long the trigger must remain true before sending the notification.
- E.g. The loan would have to stay late for 1 hour without being returned for the notification to be sent
- “Triggered by” : Who can trigger the notification.
- E.g. Only send new loaner notification when group A creates a loaner
For our example, the trigger will look like this:
2.2 Filters
Filters are a really important part of the new notification system. They can be used to reduce the amount of notification being sent, and to separate the configurations by groups. For example, we might not want to have the same loaner notifications on all stockrooms.
To add a filter group, simply click the “Add a filter” button. This section might look a bit difficult to understand, but I will try to explain every part with a step-by-step
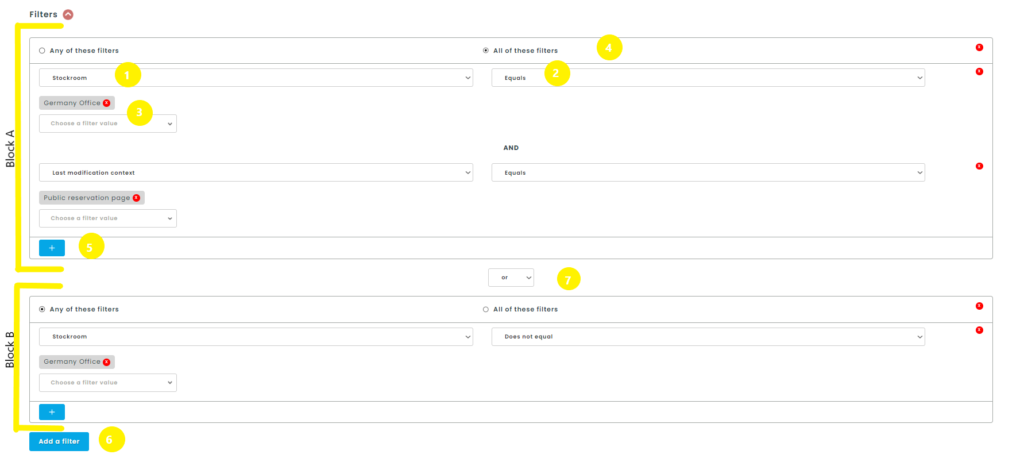
- Select the first element you want to filter.
- Select the comparison operator of your choice.
- Choose one or multiple values to fit the above selection.
- Decide if you want all the filters inside the same block to have to be true or only one of them.
- Add as many filters as you want to a group by pressing the “+”.
- Add as many blocks as you want.
- Specify between each block if you want one of them to be true or any of them to be true.
The filters in the example would read like so: The new reservation needs to have either one of the following be true:
- Be a reservation for the Germany Office AND have been made by the public reservation page
- Not be a reservation for the Germany Office
2.3 Action
As mentioned above, the only possible notification option for now is the email notification.
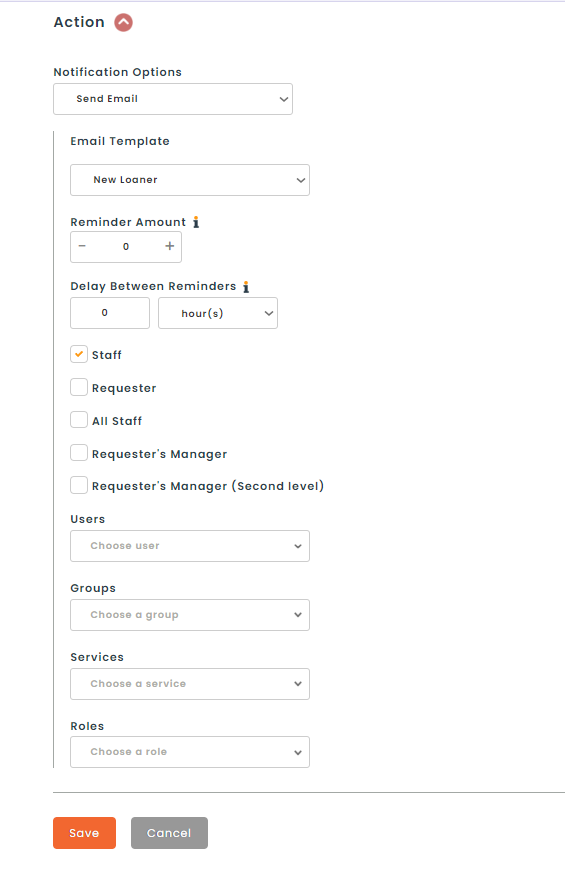
Start by selecting the template you want associated with the notification from the list.
If you want the notification to be sent more than once as a reminder, you can specify the amount of time and interval between every time.
Finally you have to choose who is going to receive the notifications. Two types of users can be selected from this list.
The first ones, who are represented by checkboxes, are dynamic users who will change depending on the context of the notification. For example, the staff and requester will be different most of the time.
You can still add specific users/groups/departments/roles if you always want them to receive this notification, no matter the context.
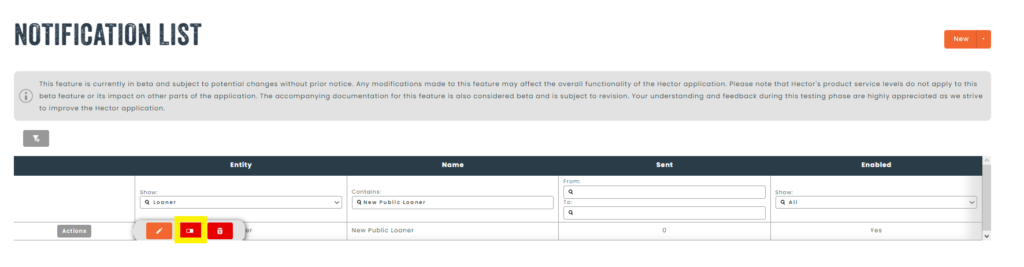
Don’t forget to save the notification once you are done. If you aren’t finish but don’t want to lose your progress, or if you simply want to disable a notification, you can do so in the notification list > Action > Deactivate.
Thank you for reading and we hope these new notifications can help you keep track of what is happening with your assets!