SCIM, which stands for System for Cross-domain Identity Management, is an open standard designed to automate the process of user provisioning. Originating in 2011, its development was prompted by the recognition that future technology trends would lean towards cloud-based systems. SCIM facilitates the communication of user identity data between identity providers (such as organizations with numerous individual users) and service providers that necessitate user identity information, such as enterprise Software as a Service (SaaS) applications.
How to setup SCIM with Azure and Hector?
You can synchronize users between your Azure environment and Hector using our SCIM integration.
Requirements
- Available for all on the Castle plan
- Can be purchased “A la carte” on the Armor plan
- Must have access to the Settings and Integrations section

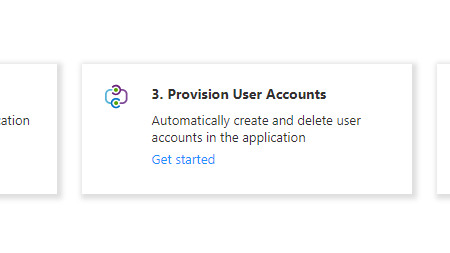
1. Azure – Enterprise Application
- Navigate to the Azure Entra ID section (previously Azure Active Directory)

- Click on the Enterprise applications section

- Click on the + New application button

- Create your own application

- Name the application Hector SCIM
- Select “Integrate any other application you don’t find in the gallery (non-gallery)

- Once the app is created, click on 3. Provision User Accounts – Get started link.
- Click the Get started button

- We’ll leave Azure momentarily in order to capture some information that exists in Hector.
2. Hector – Value Retrieval
- Navigate to the Settings > Integrations > Resources section in Hector.
- Click on the Add button to get started.

- Copy the Tenant Url (1)
- Copy the Secret Token (2)
- Take note of the expiration date of the token

- Click on the Save button at the bottom of the screen.

3. Azure – Application Setup
- Return to the Azure configuration screen
- Select “Automatic” for Provisioning Mode
- Copy the values from Hector into the text boxes

- If you properly copied the values, you should get a success message at the top right of the Azure portal.

- You may enter optional settings, but it is not required for proper configuration between both platforms.

- Once finished, click on the Save button

4. Azure – Mappings
- Navigate to the Provisioning section of the Enterprise application

- Click on the Provisioning section in the left menu
- Click on the Provision Azure Active Directory Users

- Required Fields (do not delete these fields)
- userPrincipalName
- Switch([IsSoftDeleted], , “False”, “True”, “True”, “False”)
- givenName
- surname
- Delete the mailNickname -> externalId line (we will replace it with another mapping)


- Click on Add New Mapping
- Select the objectId as Source attribute *
- Select the externalId as Target attribute *
- If the externalId is not available as a choice, it means the mapping was not properly deleted in the previous step.
- Click OK

Email Address Management
- You have two choices when mapping an email address to Hector.
- UPN (userPrincipalName field) default
- Email (mail field)
- If your organization works with UPN, you can delete the mail -> emails[type eq “work”].value mapping

- If your organization works with the Email field, leave the mapping in place, as Hector will automatically use the Email field (if it exists) when creating a user.
Unique Identifier Management

- You have two choices when mapping a field for the Unique Identifier
- Employee Number (if exists) default
- UPN fallback
- If you would like the UPN to always be used, you can simply remove the following mapping.

- Once finished, you can click on the Save button.

5. Azure – User and Group Selection
- You can select which users and groups will be synchronized

- We recommend synchronizing groups, at they are easier to manage and can be associated to specific roles within the Hector application.
- As an example, we will synchronize five groups, and three will be used role for role assignment.
- hector_admins – Role and Group
- hector_staff – Role and Group
- hector_users – Role and Group
- Hector Employees – Group only
- hector_places – Group only


Important Information
- All users in the groups will be created/updated/delete in Hector whenever changes are made in Azure based on the mapping rules.
- Users found in a group, which is not used for role assignment, will be assigned the default role in the Hector application.
- Groups can be used to restrict access to records in Hector, so you may want to synchronize more than just groups for roles.
6. Hector – Role/Group Association
- Before we finish in Azure, let’s hop over to Hector and assign the groups from the previous step to the roles in Hector.
- Navigate to the Settings > Integrations > Resources > SCIM page.
- Scroll towards the bottom of the page.
- Associate the selected groups in Azure to the selected roles.
- More than one group can be associated to a role
- Separate the groups with a semi colon ;
- Roles can be left empty.
- This only means no user will be assigned that role during synchronization.
- You may reorder the roles if users can be found in more than one group. The role that is highest in the list will be assigned to the user.
- You can check the “Overwrite roles” checkbox, if you want Azure to overwrite any changes made in Hector by administrators.

- Once finished, click on the Save button.
7. Azure – Turn on provisioning
- You are now ready to sync users between Azure and Hector. Click on the “On” button of the Provisioning status.

- Azure users and groups are synchronized every 40 minutes.
- If a user is removed from all synchronized groups, they will be deactivated in Hector.
- Any assets or loaners assigned to them will remain.
- If a user is disabled in Azure, they will be disabled in Hector.