
Welcome to the Outlook and Hector implementation guide!
This integration is designed to follow and update the Outlook events made on your rooms directly in Hector.
Introduction
The first step of the integration is to synchronize the rooms inside your Azure to Hector. Then, when an Outlook event is created/updated on one of those rooms, we create/update it in Hector in real time, or vice versa.
Azure App Setup
You will first need to register a new app in your Azure environment, or use the same one as your Azure User Synchronization. If you are using the same Registered App, you can skip to the permission section of the Azure App Setup
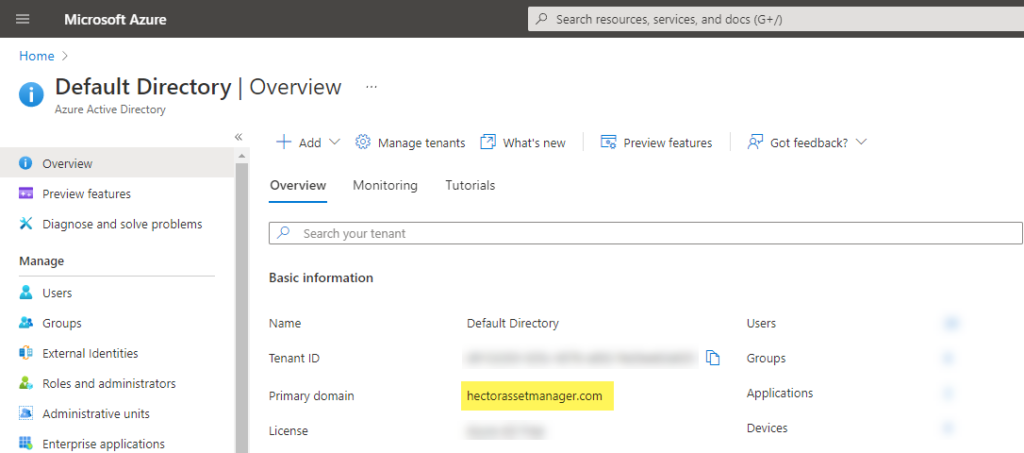
1. Primary Domain
*You must have administrator privileges on your Azure Active Directory in order to do the following steps.
Connect to your Azure Portal and click the “Azure Active Directory” section. Copy your Azure Primary Domain located below as you will need it later in this guide.
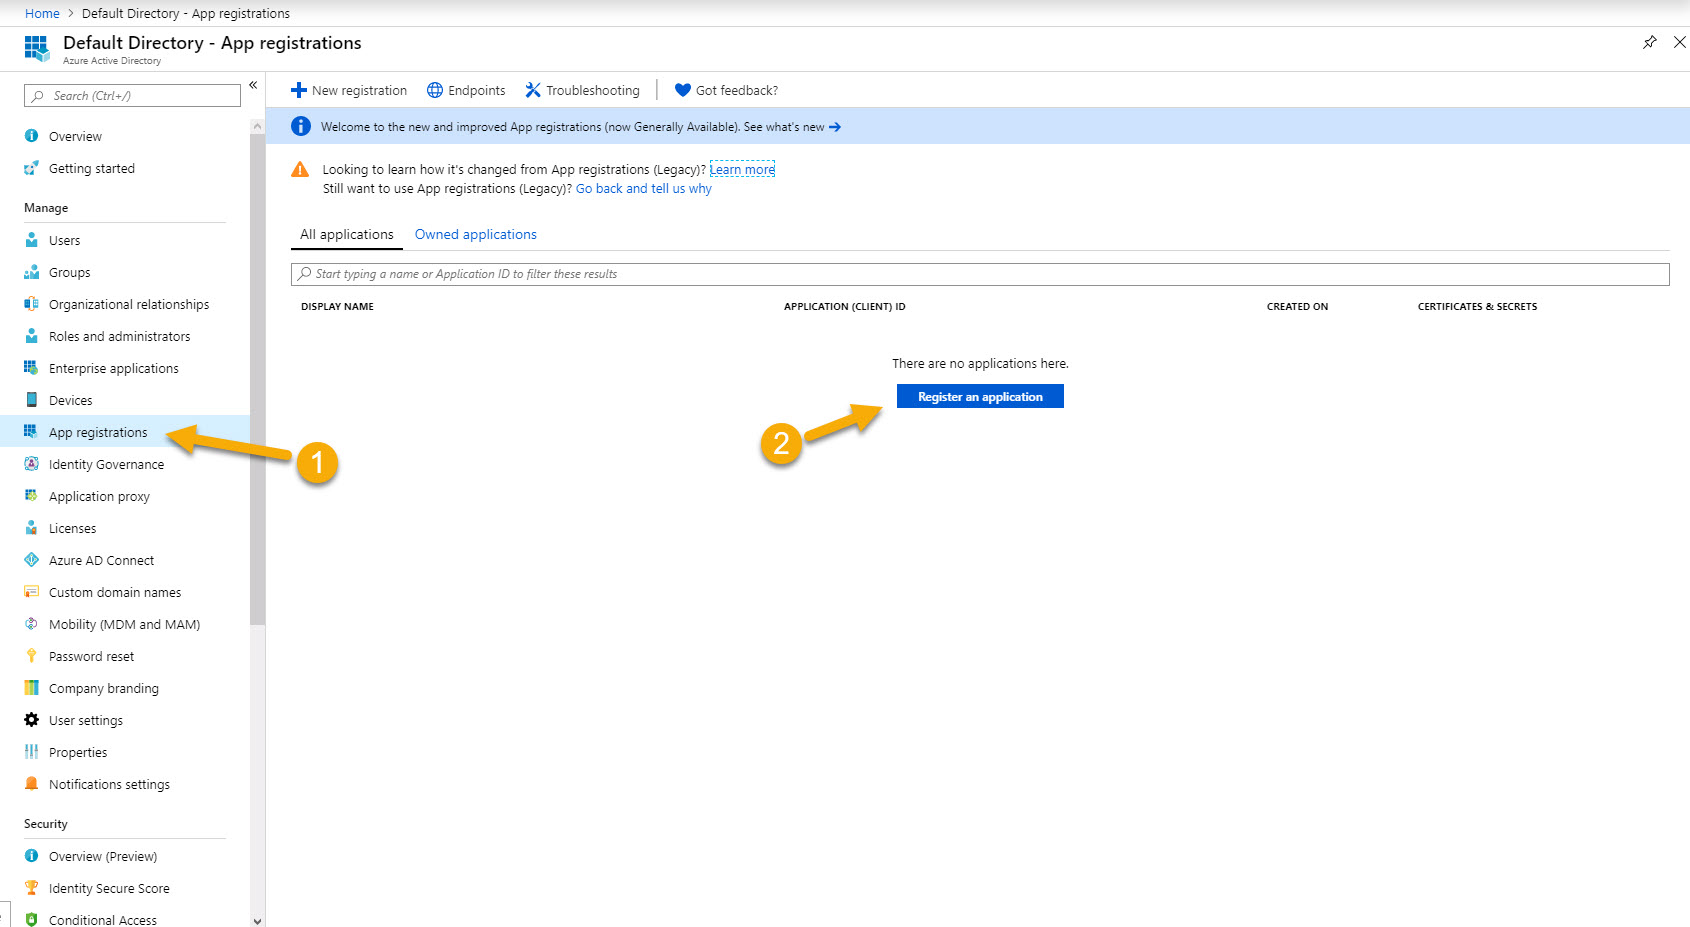
2. App Registrations
Click the “App Registrations” button on the menu and then click on the “Register an application” button.
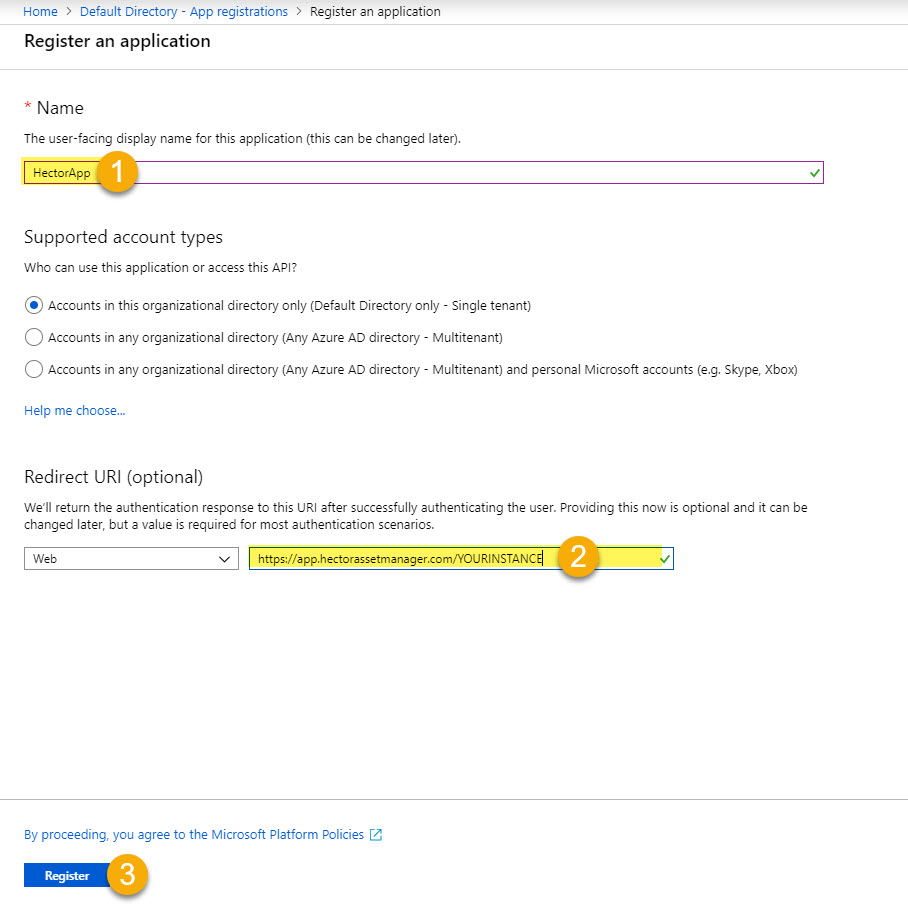
Enter a name for the application, we recommend “HectorApp”. Provide a redirect URI, we recommend entering your Hector URL. Click “Register”.
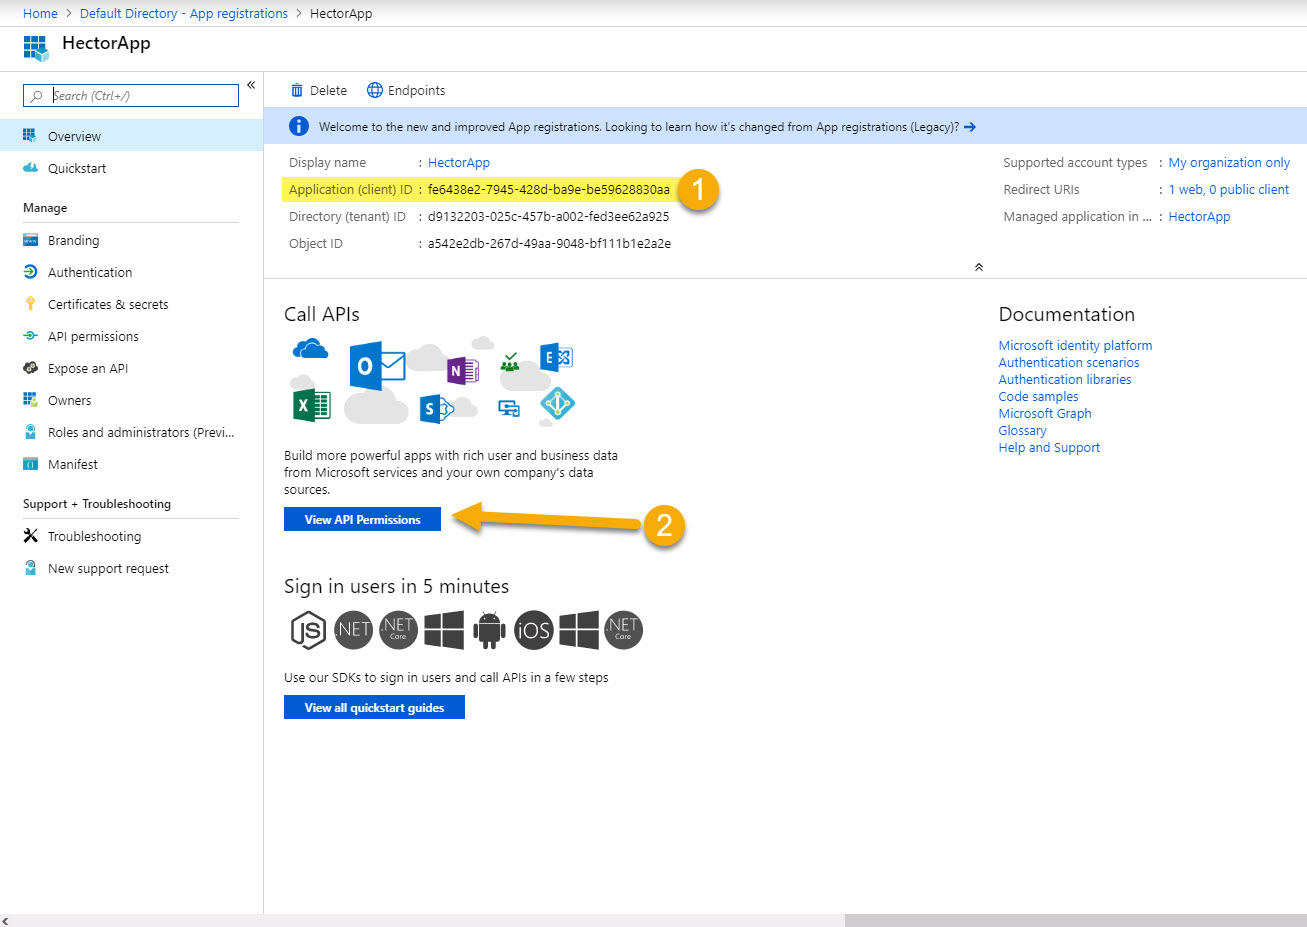
Copy the “Application (client) ID” and save it for later.
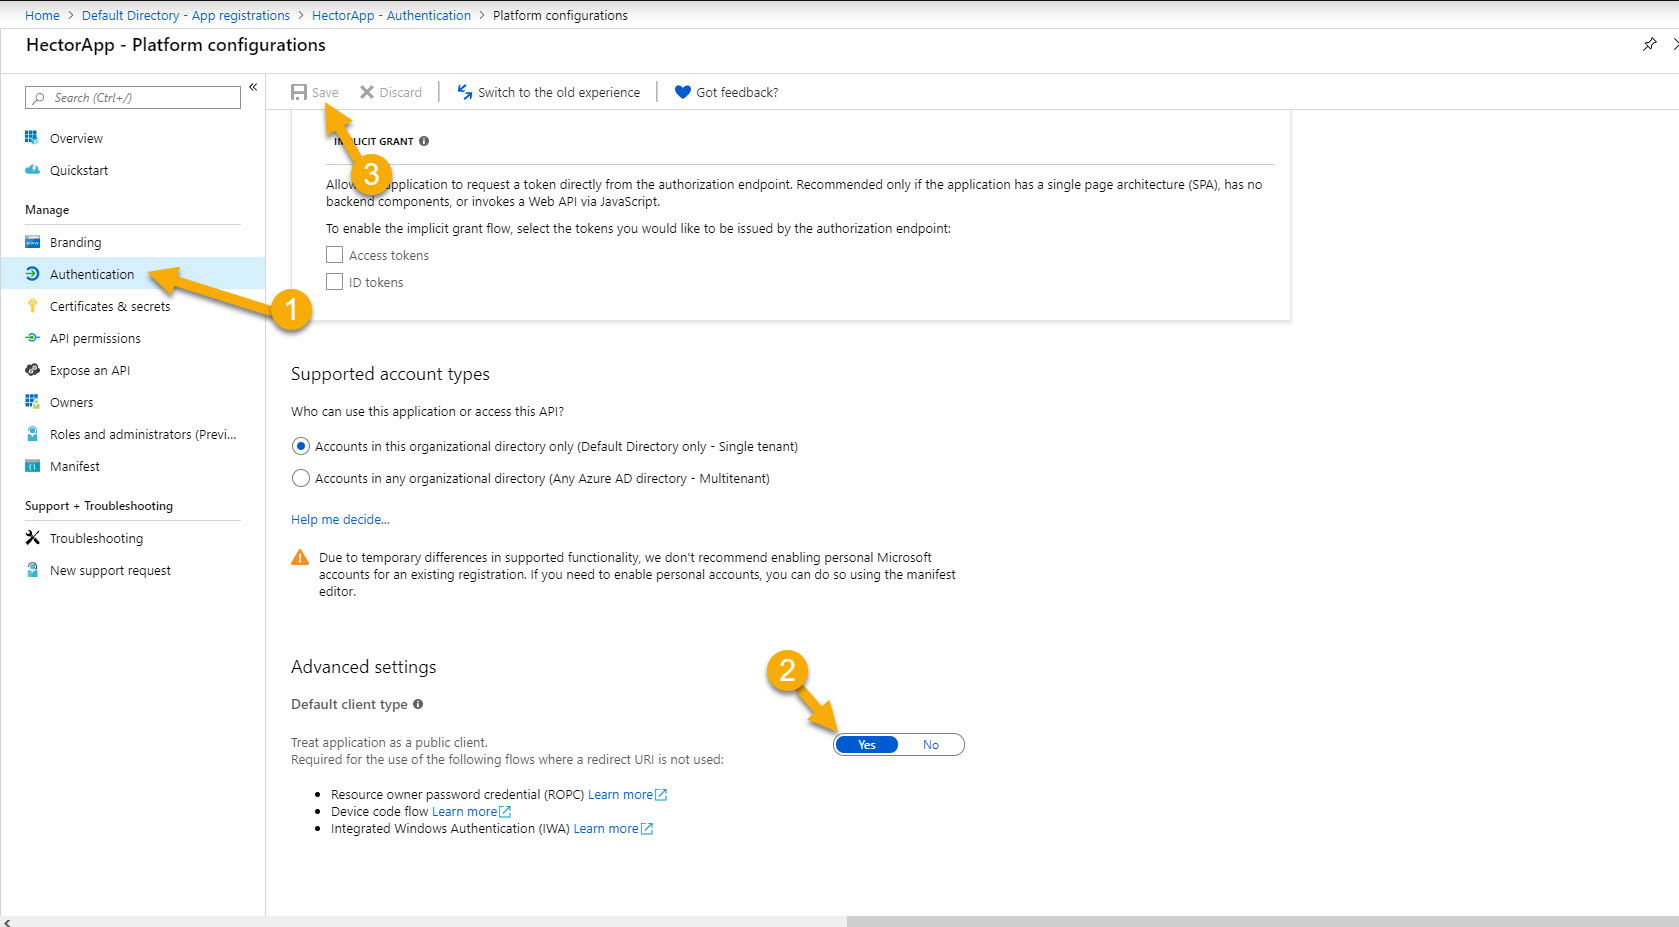
3. Public App
We are going to have to make the application public in order for Hector to connect to it. To do so, click the “Authentication” section and scroll to the “Advanced Settings”. Change the “Application as a public client” to “Yes” and save your changes.
4. Secret Key
Click on the “Certificates & Secrets” section.

Next click on the “+ New client secret” button. Enter “HectorApp” as a decription and 24 months (or your prefered value) as the expiration delay, then “Add”.

Copy the secret value (**Not the secret ID**) and save it for later.
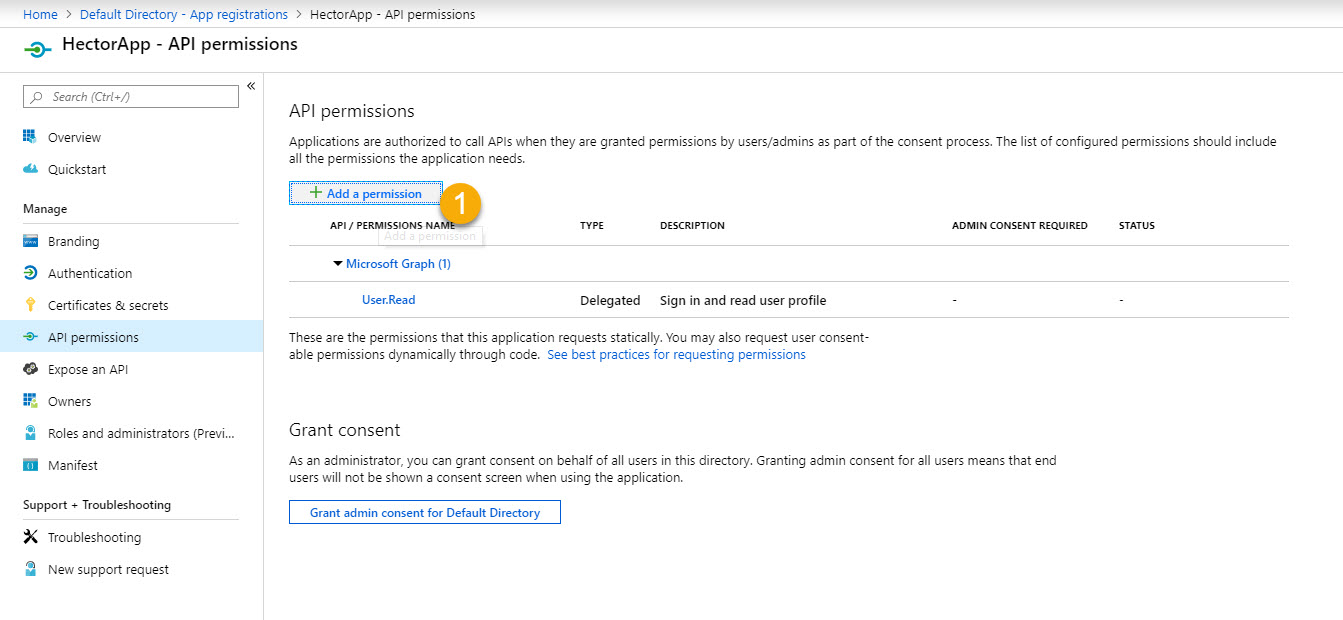
5. Permissions
Click the “API Permissions” section, then the “Add a permission” button.
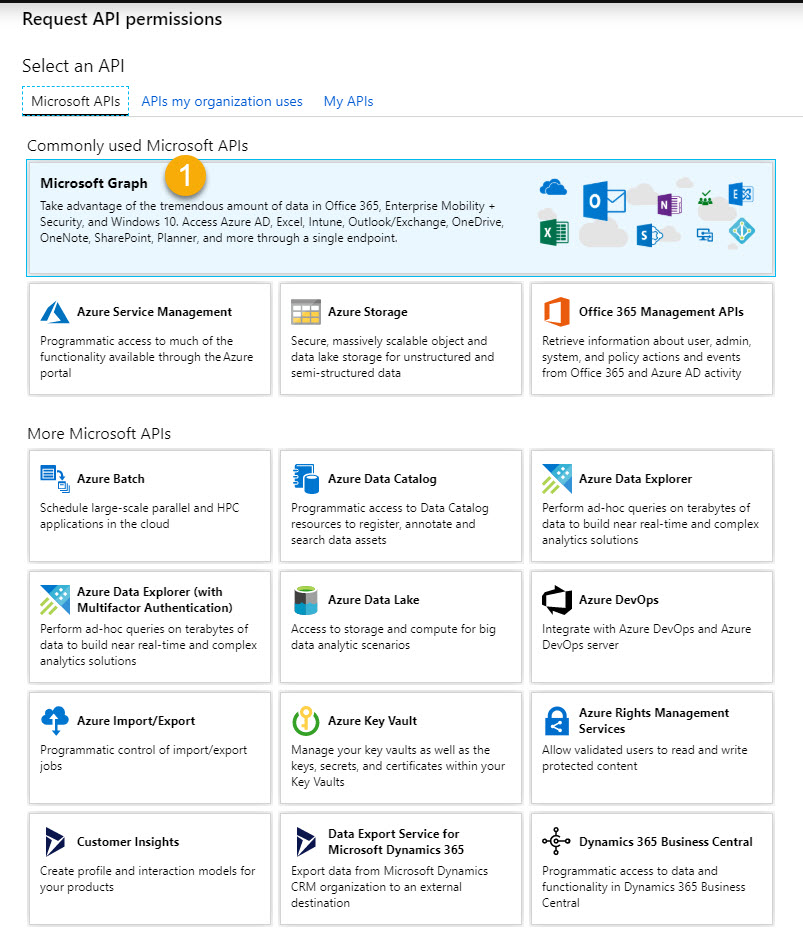
Click on the “Microsoft Graph” section.
Click on the “Application permissions” section.
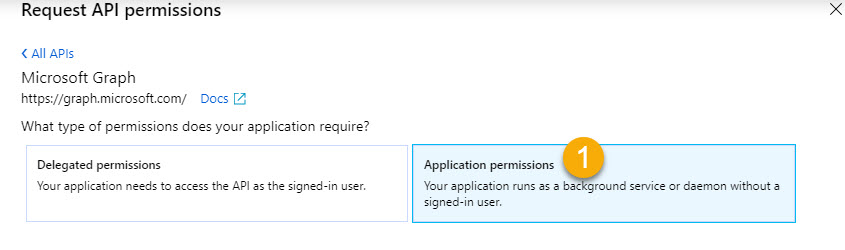
The permissions needed for this integration are the following:
- Calendars
- Calendars.Read
- Calendars.ReadBasic.All
- Calendars.ReadWrite
- Mailbox Settings
- MailboxSettings.Read
Once the permissions are added, you must grant consent to the new permissions. To do so, click the “Grant admin consent for ……………” button and confirm the dialog box at the top of your screen.
A confirmation message should indicate that all permissions have been added and consented by an administrator.
Exchange Rooms Creation
To create the rooms, we suggest you create them in your Exchange Admin Center, in the resource section. Click the “+ Add a room resource” button to create every room you want to import in Hector.
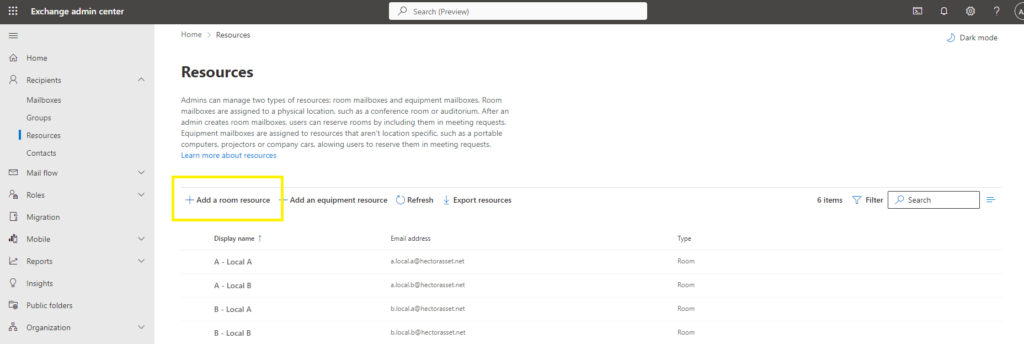
The name, email and address are synchronized in Hector. Sadly the booking options are not yet exposed by Microsoft’s API so we cannot automatically import them into Hector. You will have to edit every room one by one if you want to recreate your booking permissions inside Hector.
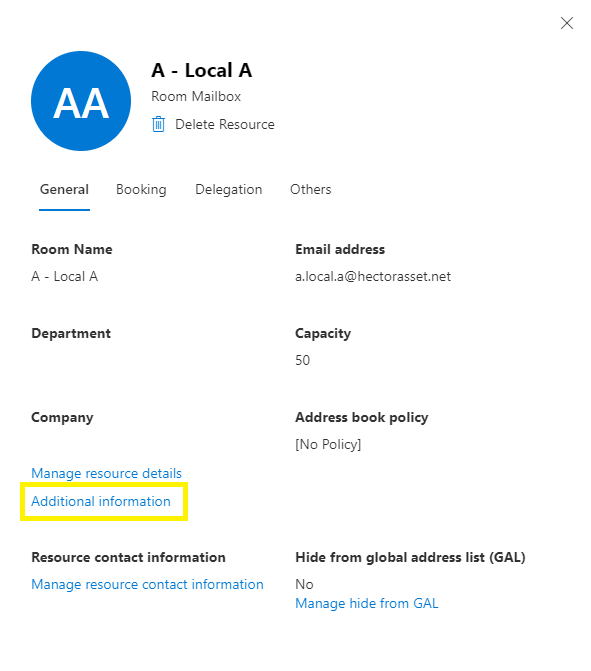
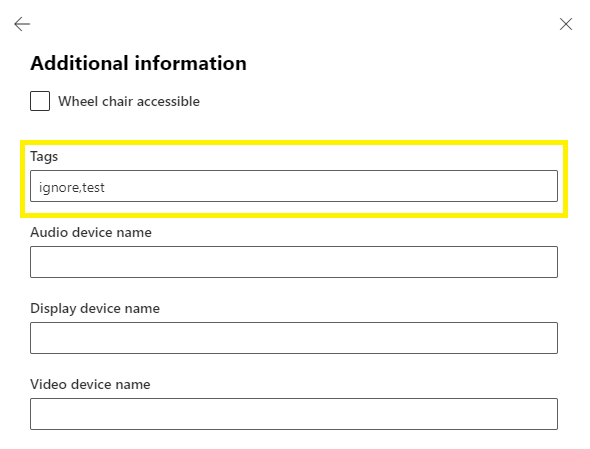
You might have some rooms inside your Exchange that you won’t want to be synchronized with Hector. To avoid them being synched, you can add a tag of your choice to all of them. In the Hector setup you will be able to specify which tags you don’t want to import. To add a tag, Click on your room, then click on “Additional information”. You can add any amount of them by separating them with commas in the tag field. Don’t forget to save.
Hector Setup
We are now going to enter all the information collected above in Hector. To do so, Connect to your Hector instance as an administrator, go to integration list in the Loaners section and click to add the Outlook Integration (Settings > Integrations).

You will see a list of fields, some of them familiar and some of them not. Here is what you are gonna need to enter into all of them:
- Tenant: The primary domain collected earlier
- Client Id: The client Id collected earlier
- Secret: The secret collected earlier
- Default Stockroom: The stockroom in which your rooms are going to be imported
- Default User: A default user that has a mailbox inside your Azure directory. This user is going to be used if a reservation is made with a user that is outside of your tenant.
- Tags to Ignore: Related to the tags entered on the rooms earlier. Rooms containing one of those tags won’t be imported into Hector.
The synchronization will start within a few minutes after you save your changes. You will be able to tell the sync is over once all of the rooms you wanted to import are in the Resources > Places section of Hector.

Usage
In this section, we will describe what you can or can’t do with this integration. Which Outlook information is synchronized in Hector and vice versa.
What you can do
- Create and update rooms and their basic information from Azure to Hector.
- Create, update or cancel events in Outlook and see the changes in Hector.
- Create, update or cancel reservations in Hector and see the changes in Outlook.
What you can’t do
- Synchronize the booking options of your Azure rooms with Hector.
- Do a big import of all the events that have been creating before you activated the integration.
- This integration works with webhooks that are sent whenever an action is taken on a particular room. If you want to synchronize events that have been created before the integration was activated, you will have to do a “fake edit”, meaning you can edit the event and save without making any changes. This will send a webhook to Hector and we will know to synchronize this event
- Only events and reservations containing the synchronized rooms are going to be synched between the two platforms
What is a valid event
This small section will describe what we consider to be a valid Outlook event to be synchronized in Hector. To be valid, an event must:
- Have a valid organizer (or a valid Default user).
- Have valid begin and finish dates.
- Have at least one of the synched rooms and they need to not have declined the event.
- Have all their elements (rooms and asset if created in Hector) be available within the begin and finish date.
Creation from Outlook
If the event passes the validation explained earlier, we can create an equivalent reservation in Hector. Here is a look at what are the links between the two:
- The requester is the organizer (or the default user).
- The begin and finish dates are the same (Hector works by blocks of 15 minutes).
- The rooms become the items are the reservation.
- The status of the reservation is “new”

Update from Outlook
If the event passes the validation explained earlier and we already have a loaner attached to the event we are going to make an update (if any change was detected). The updated values can be the requester, the dates or the items. Take note that if the items are no longer available in Hector, they are going to be cancelled from the loaner, cancelling the whole loaner if all items are cancelled.
Cancellation from Outlook
If an event with a loaner attached is cancelled trough Outlook, we simply cancel the reservation in Hector.
Creation From Hector
If the reservation passes the validation explained earlier, we can create an equivalent event in Outlook. Here is a look at what are the links between the two:
- The organizer is the requester (or the default user).
- The begin and finish dates are the same.
- The title is the Id of the loaner + the name of the requester
- The description is the list of item in the reservation and a link to quickly view the reservation in Hector.
- The attendees are the synched rooms that are part of the reservation.

Update From Hector
When we update a loaner in Hector we update all of the values of the creation (organizer, begin and finish dates, title, description and attendees).
Cancellation From Hector
If a loaner is cancelled or refused through Hector, the event is simply deleted in Outlook.
Recommendations
To finish this guide, we will give you a few recommendations we think can make the integration more fluid to use.
The first would be to use the auto close and auto out status on the rooms that are synched (or event on the default stockroom itself). This makes the reservations feel more similar to Outlook events and the reservation will not become overdue which could cause availability issues with the integration if forgotten.

Secondly, we recommend matching your Exchange booking options to your Hector loaning options. Here is a mapping of the options between the two platforms:
- Allow scheduling only during working hours <=> Creating a schedule on your Hector place or stockroom (Stockroom or place option).
- Booking window <=> Maximum Reservation Delay (Stockroom option)
- Maximum Duration <=> Maximum Reservation Duration (Stockroom or place option)

We hope this guide was helpful and best of luck on your Hector journey!